Build Custom Agents
Create a custom AI agent in under 5 minutes — describe what you want, review the generated config, and watch it run.
- An Artifi account with admin access
- At least one legal entity configured
You can create a custom agent in under 5 minutes. Describe what you want in plain English, and Artifi generates the complete configuration — system prompt, tool permissions, and schedule. No coding required.
In this guide, we will build an AR Aging Reporter that monitors overdue invoices every Monday and emails a summary to the finance team.
Step 1: Open the Agent Creator
Go to Agents > Agents in the sidebar, then click Create Agent in the top right corner.
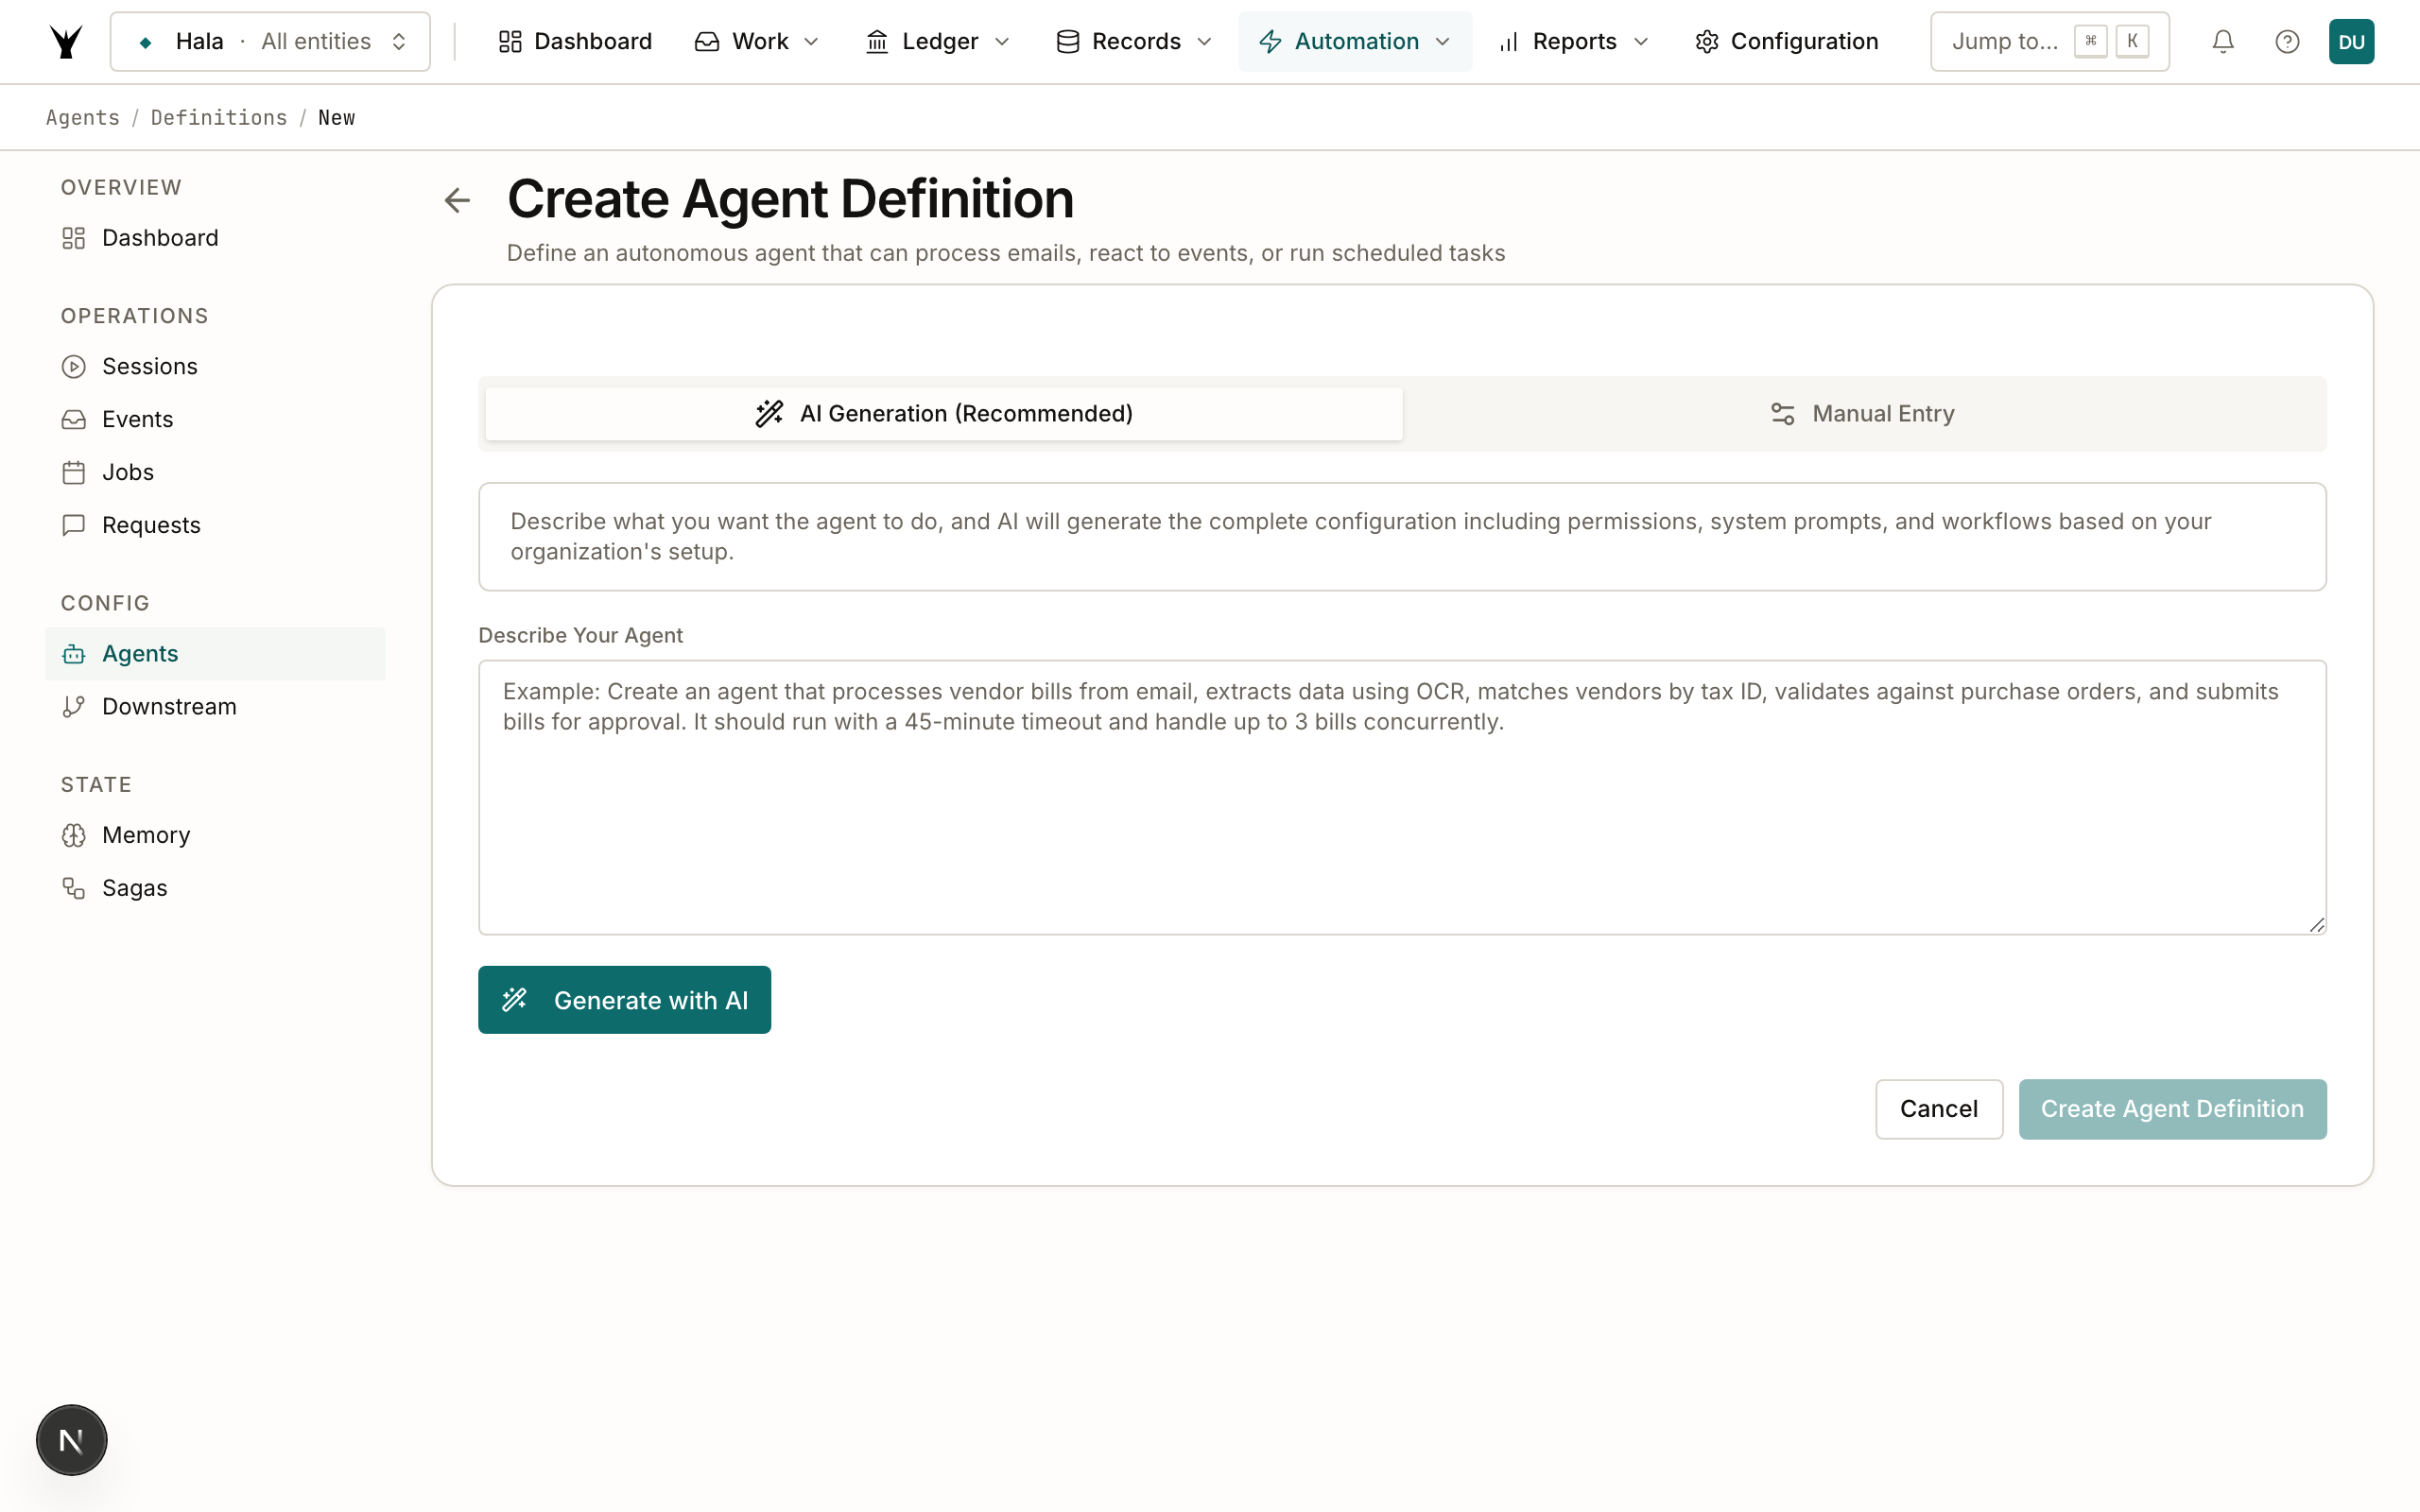
You will see two tabs: AI Generation (Recommended) and Manual Entry. We will use AI Generation.
Step 2: Describe What You Want
In the Describe Your Agent textarea, write a clear description of what the agent should do. Be specific about:
- What data to look at (AR invoices, bank transactions, etc.)
- What action to take (send email, create report, post transaction)
- When to run (every Monday, when an email arrives, on demand)
- Who to notify (email address, team)
Here is the description we used for our example:
Create an agent that monitors overdue AR invoices every Monday morning. It should find all invoices overdue by more than 30 days, group them by customer with total amounts, and send a summary email to hello@ar-ti-fi.com. Include the number of overdue invoices and total outstanding amount in the email subject line.
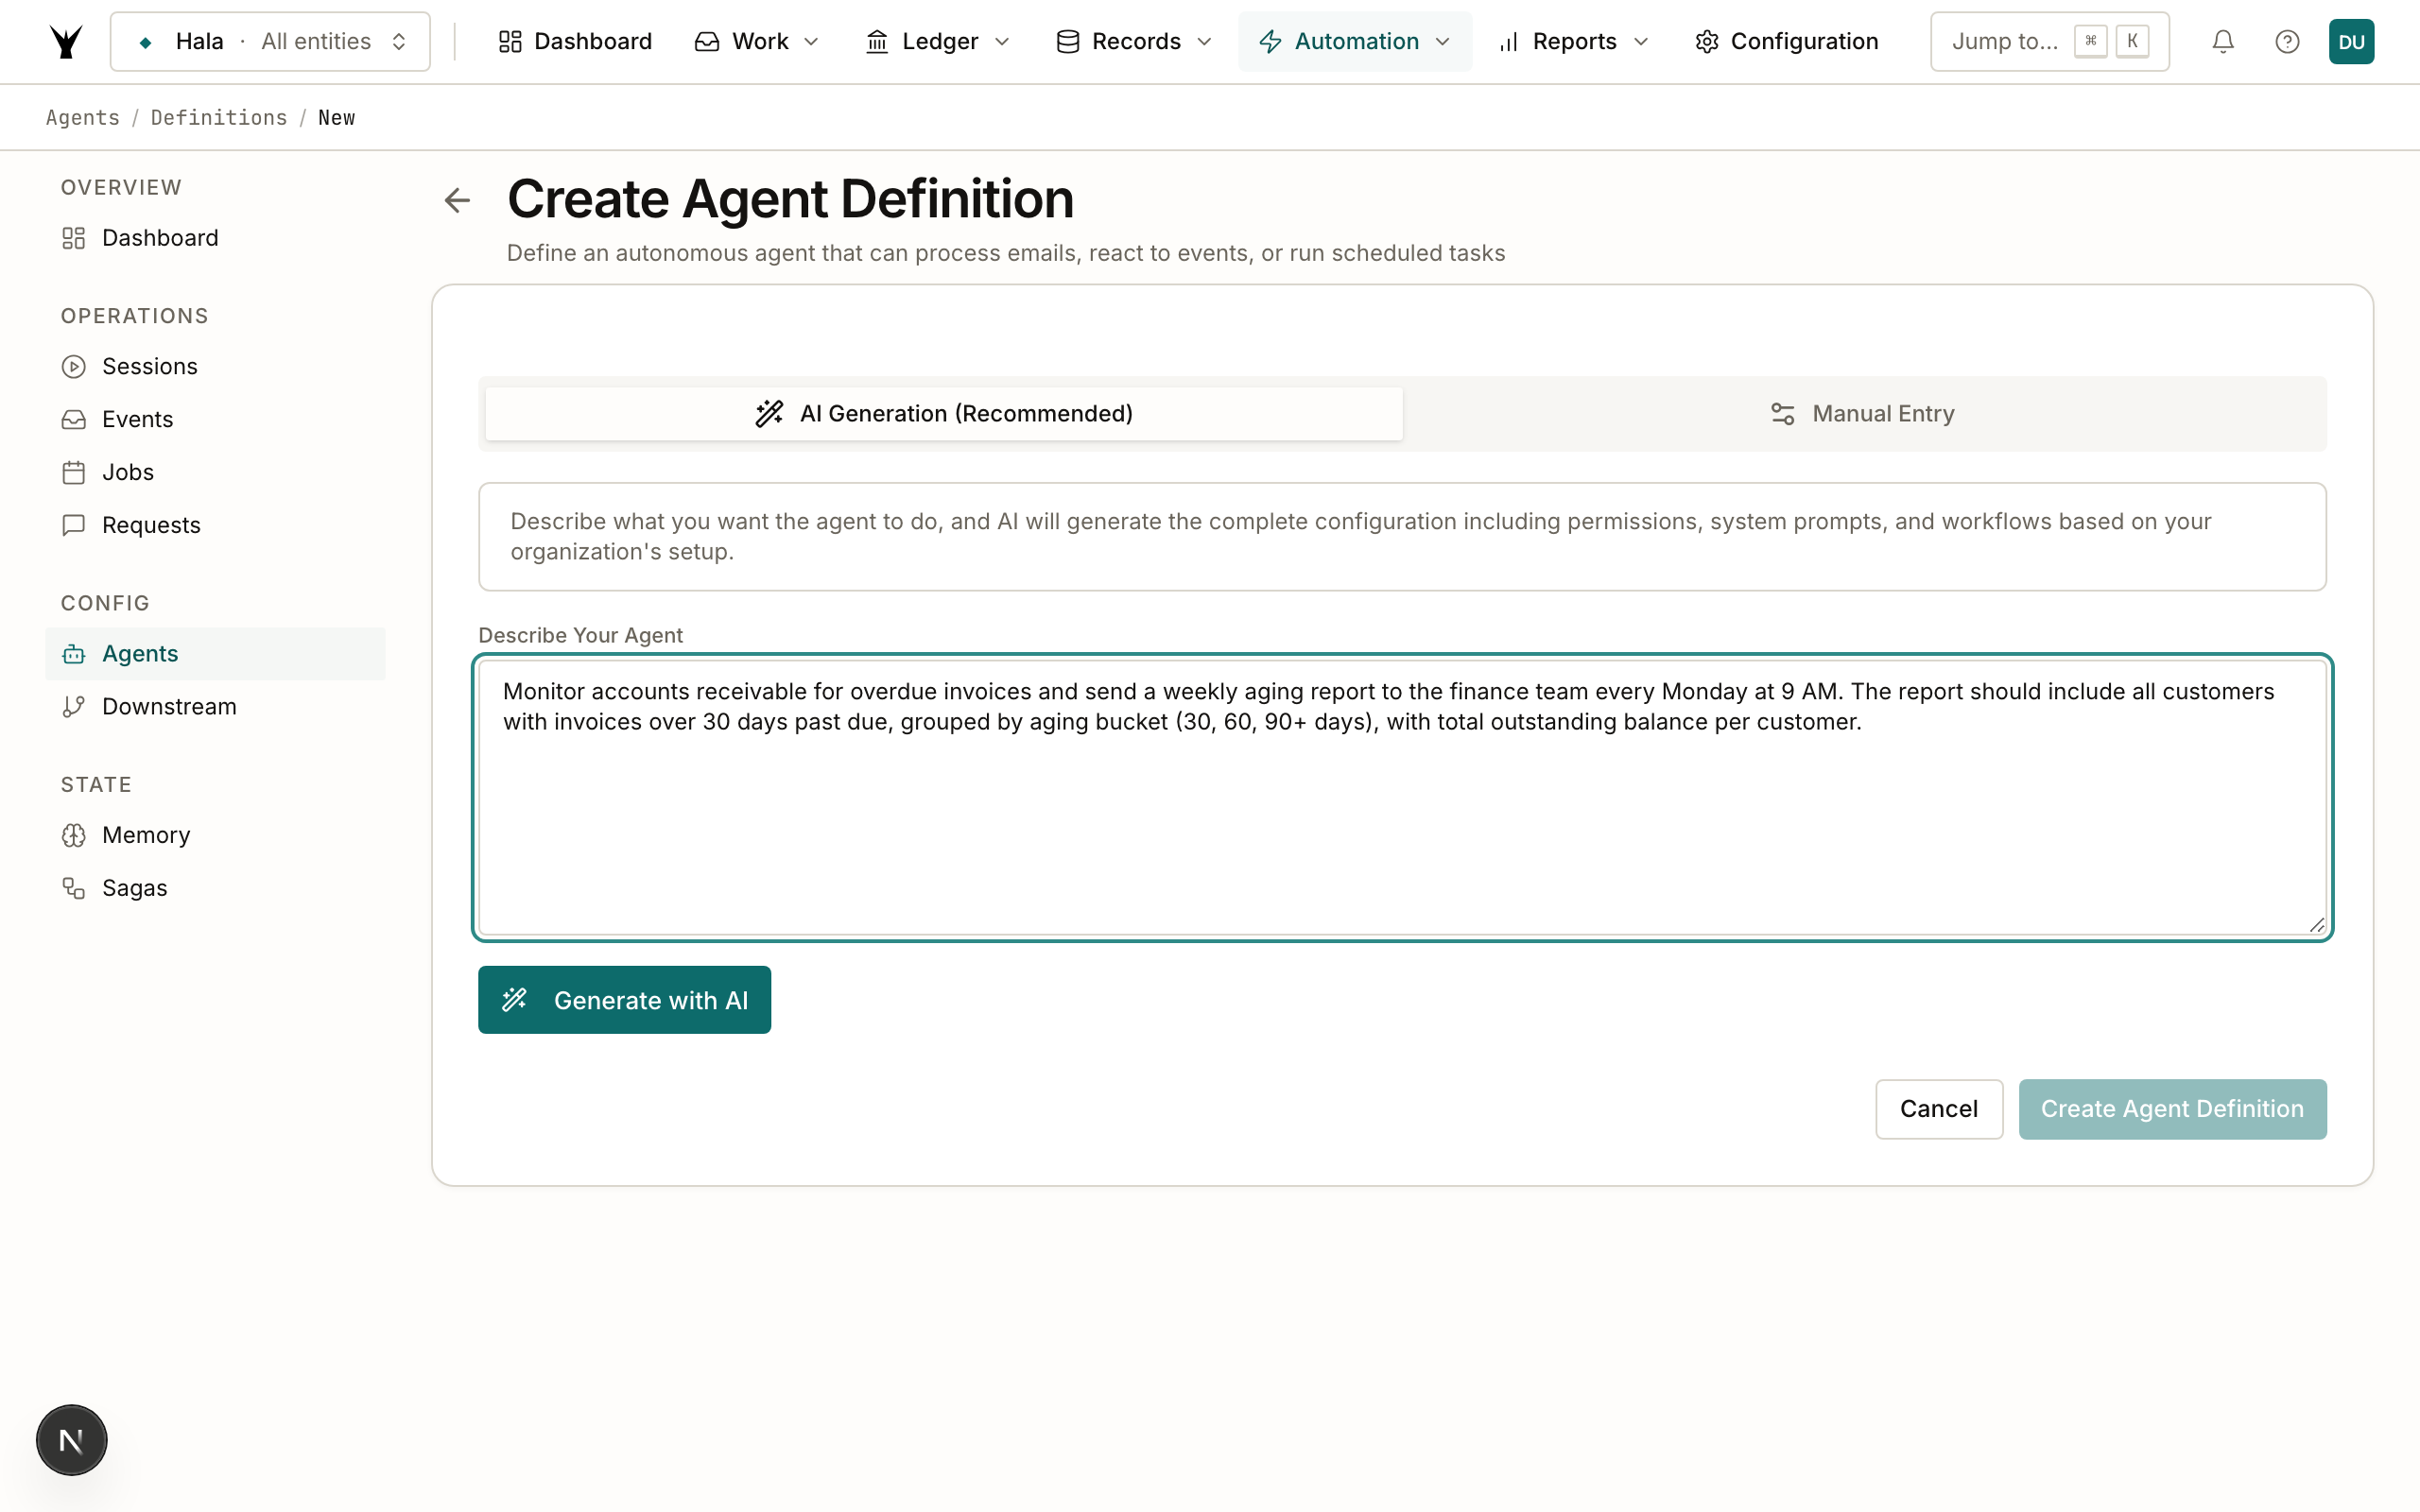
Tip: The more specific your description, the better the generated configuration. "Monitor invoices" is vague. "Find AR invoices overdue by more than 30 days, group by customer, email summary to finance team" gives the AI everything it needs.
Step 3: Generate with AI
Click Generate with AI. The system runs a two-pass analysis:
- Pass 1 (fast): Analyzes your description to identify which documentation, tools, and workflows are relevant
- Pass 2 (thorough): Generates the complete agent definition — system prompt, tool list, configuration
This takes about 30-45 seconds and costs approximately $0.08.
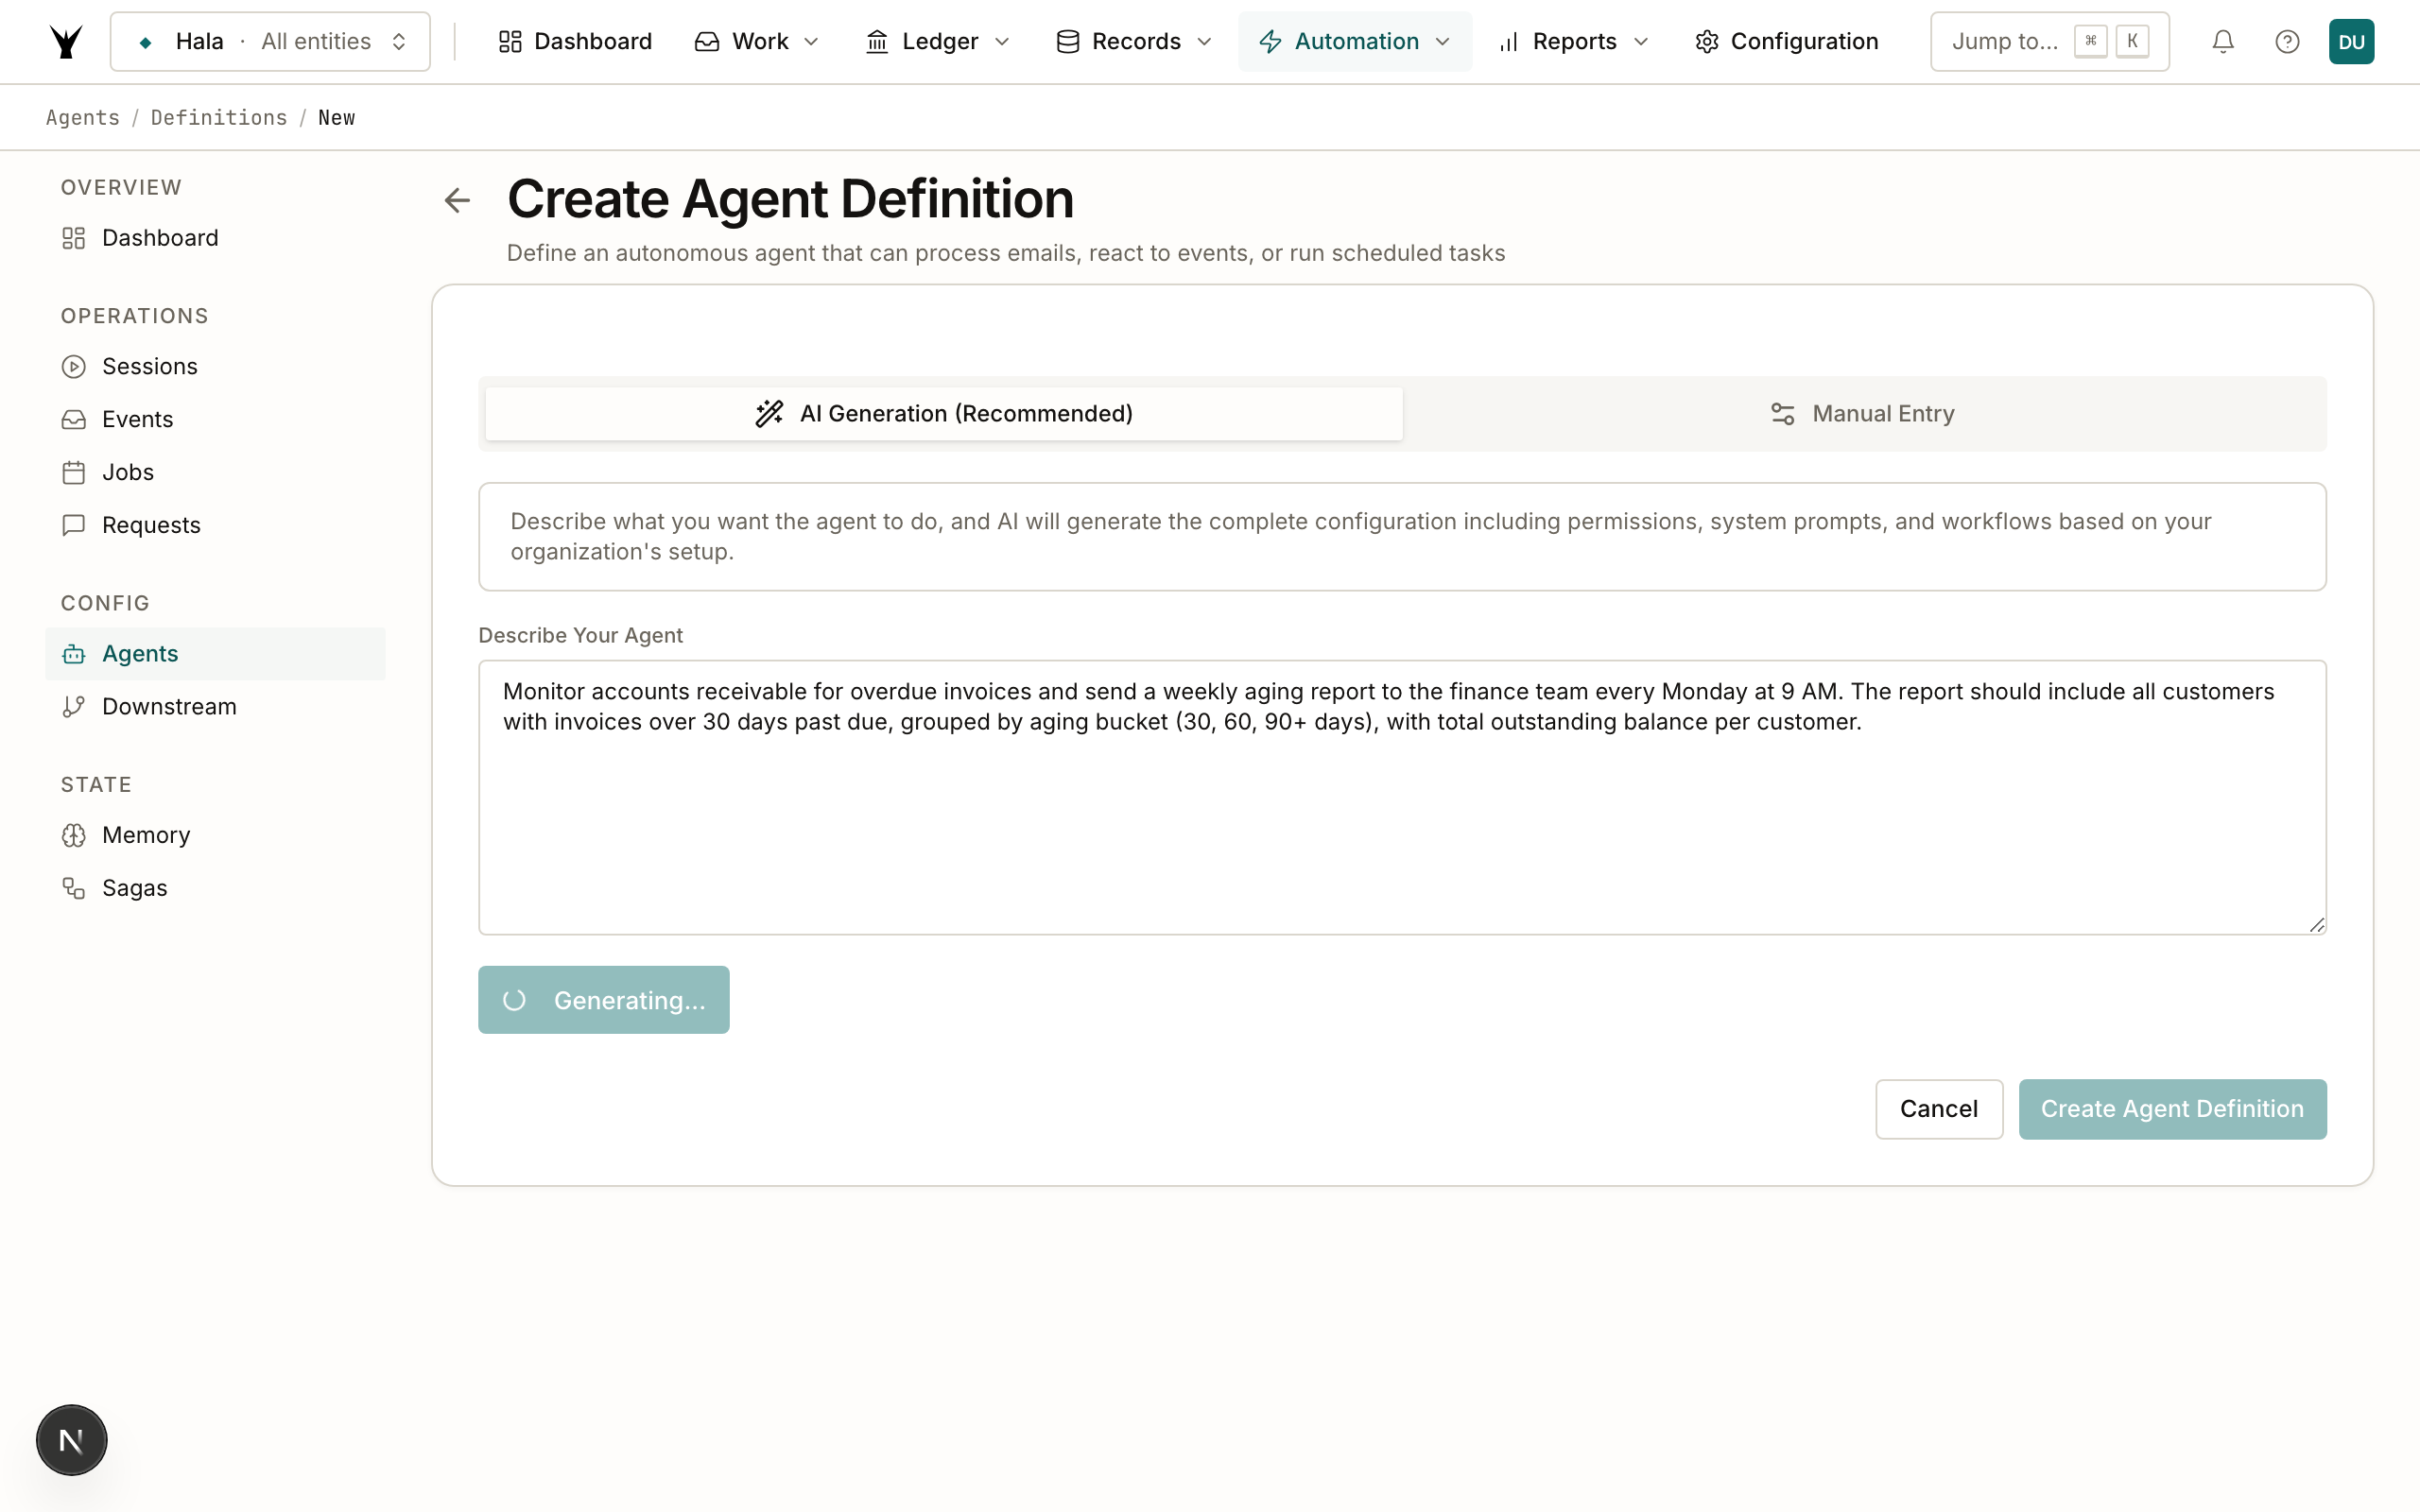
Step 4: Review the AI Analysis
When generation completes, you will see an AI Analysis section showing what the AI decided:
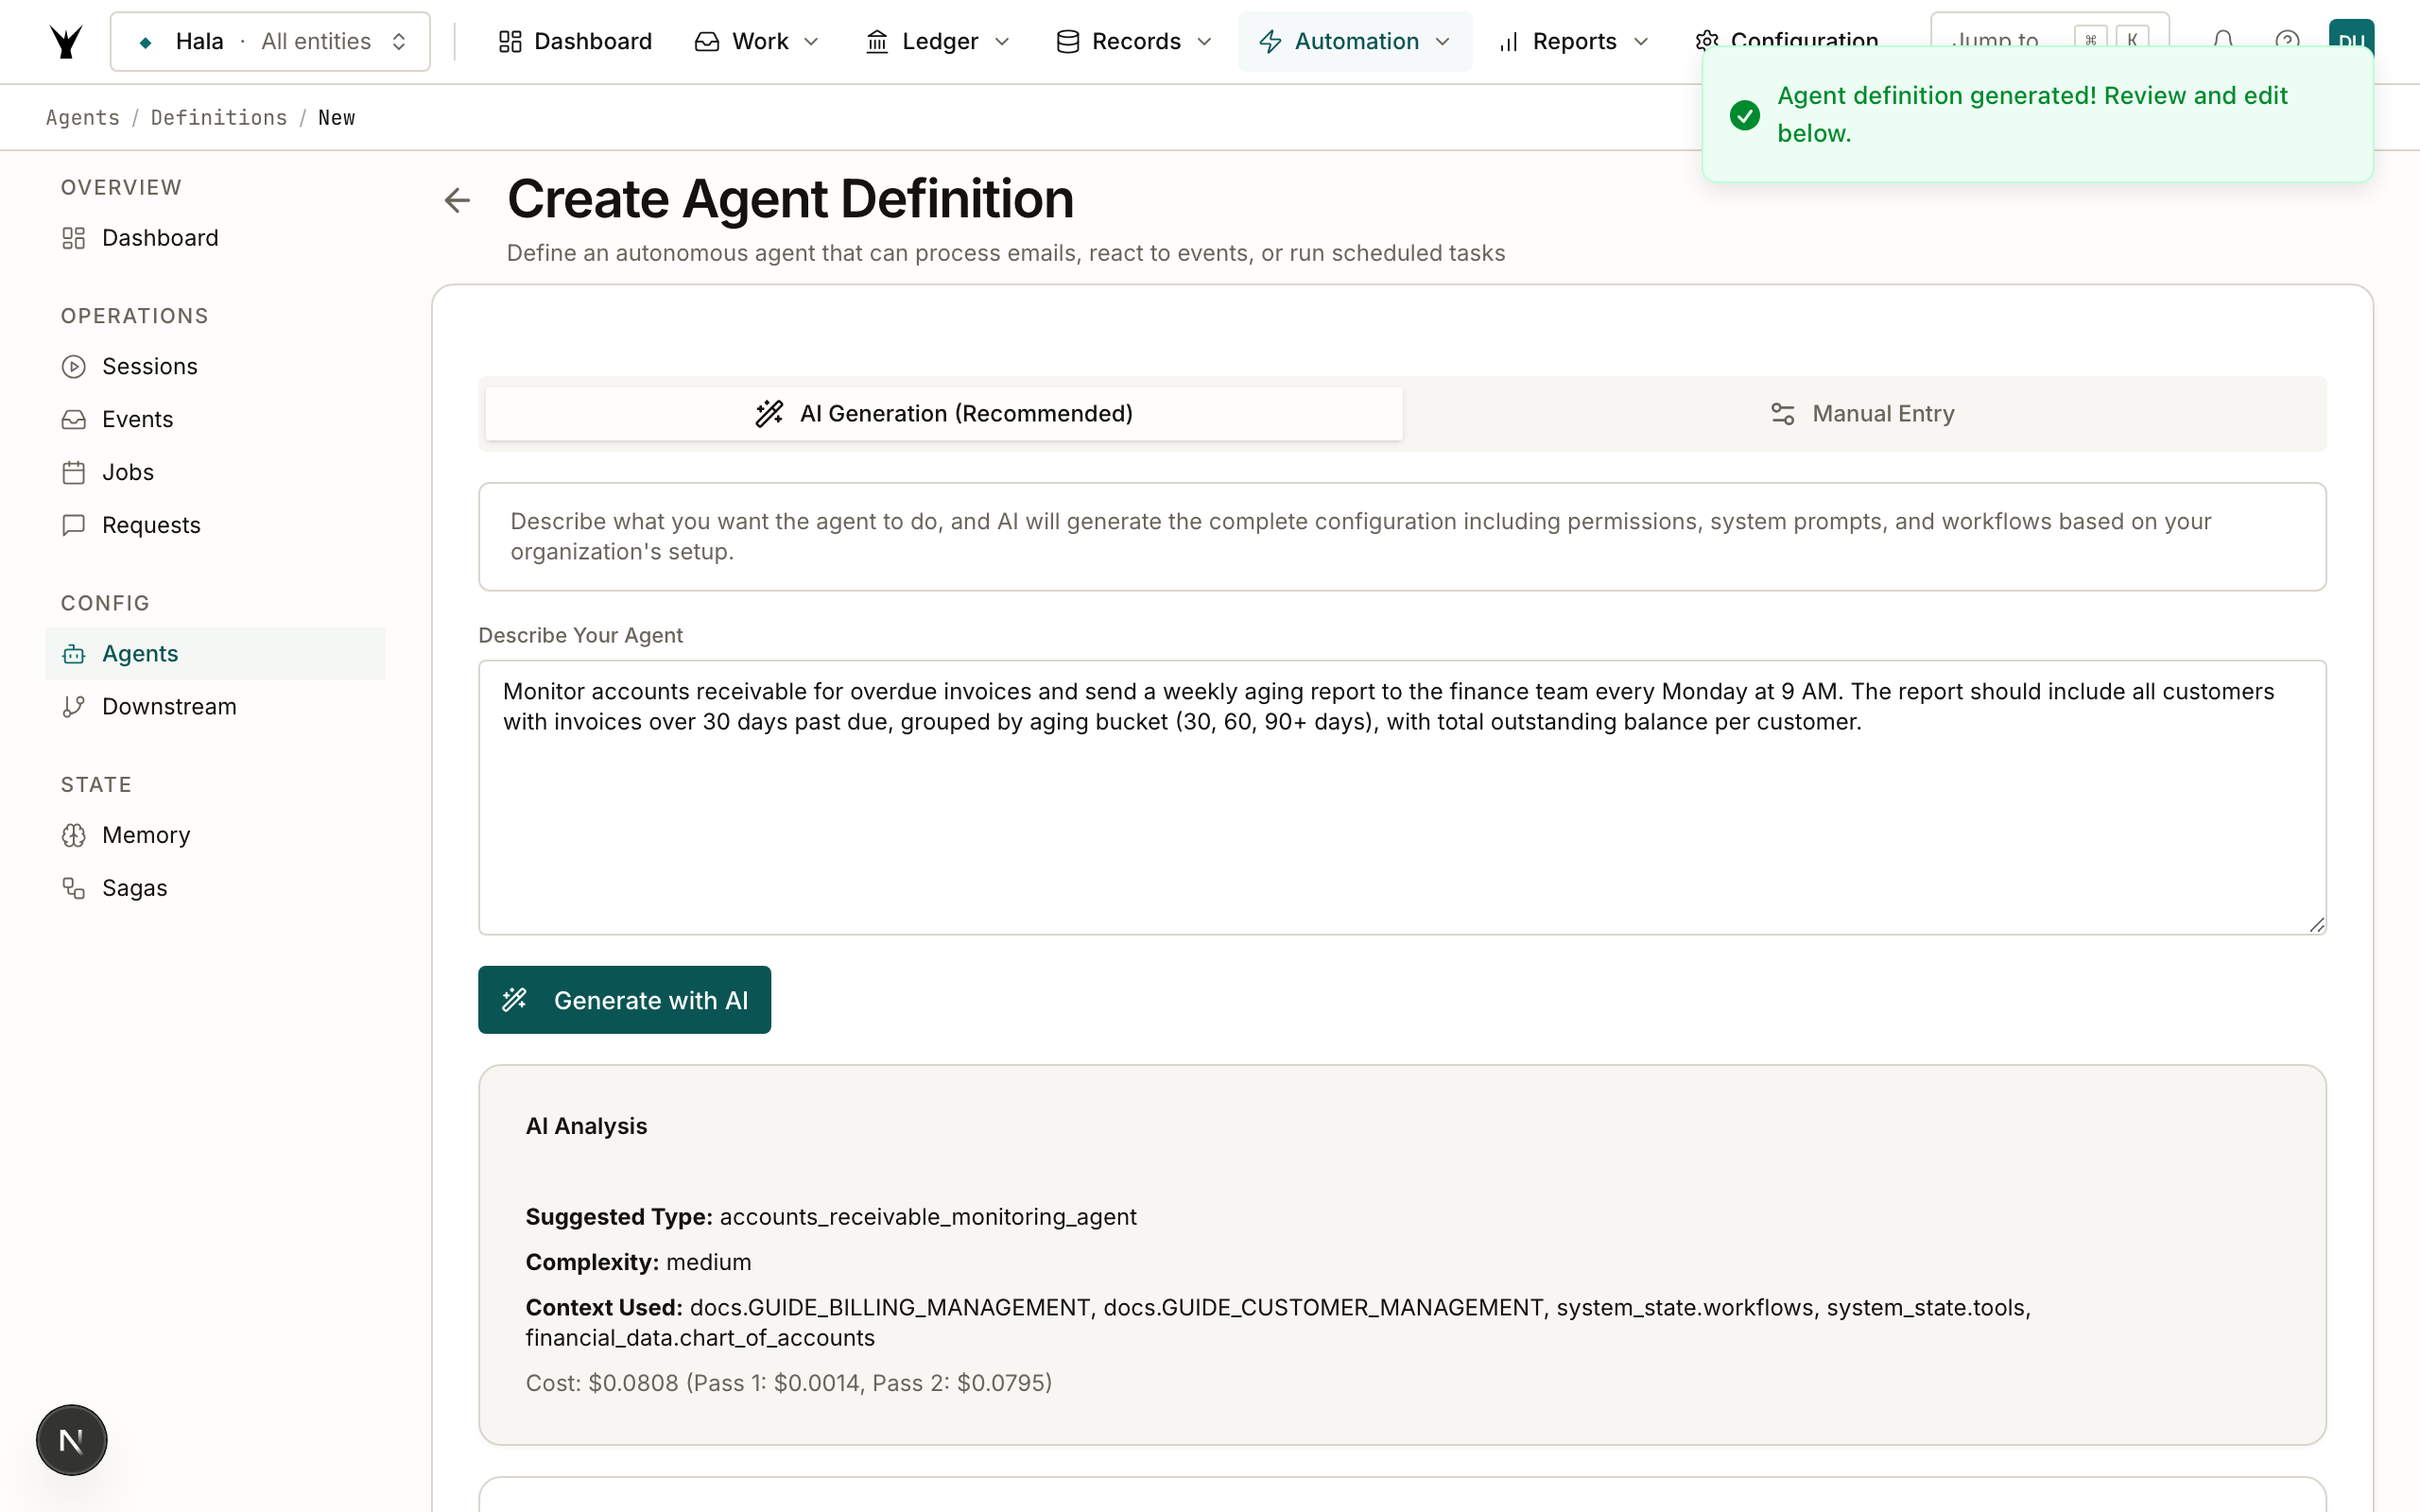
- Suggested Type: The identifier for your agent (e.g.,
ar_aging_monitor) - Complexity: How complex the AI considers the task
- Context Used: Which documentation and system data informed the generation
- Cost: The token cost for this generation
Claude.ai — Screenshot placeholder: Asking Claude to help design an agent — e.g., "I want an agent that sends me a weekly summary of overdue invoices" and Claude suggesting the description to use
Step 5: Review the Generated Configuration
Scroll down to see the complete configuration the AI generated. This is the most important part — review it before creating.
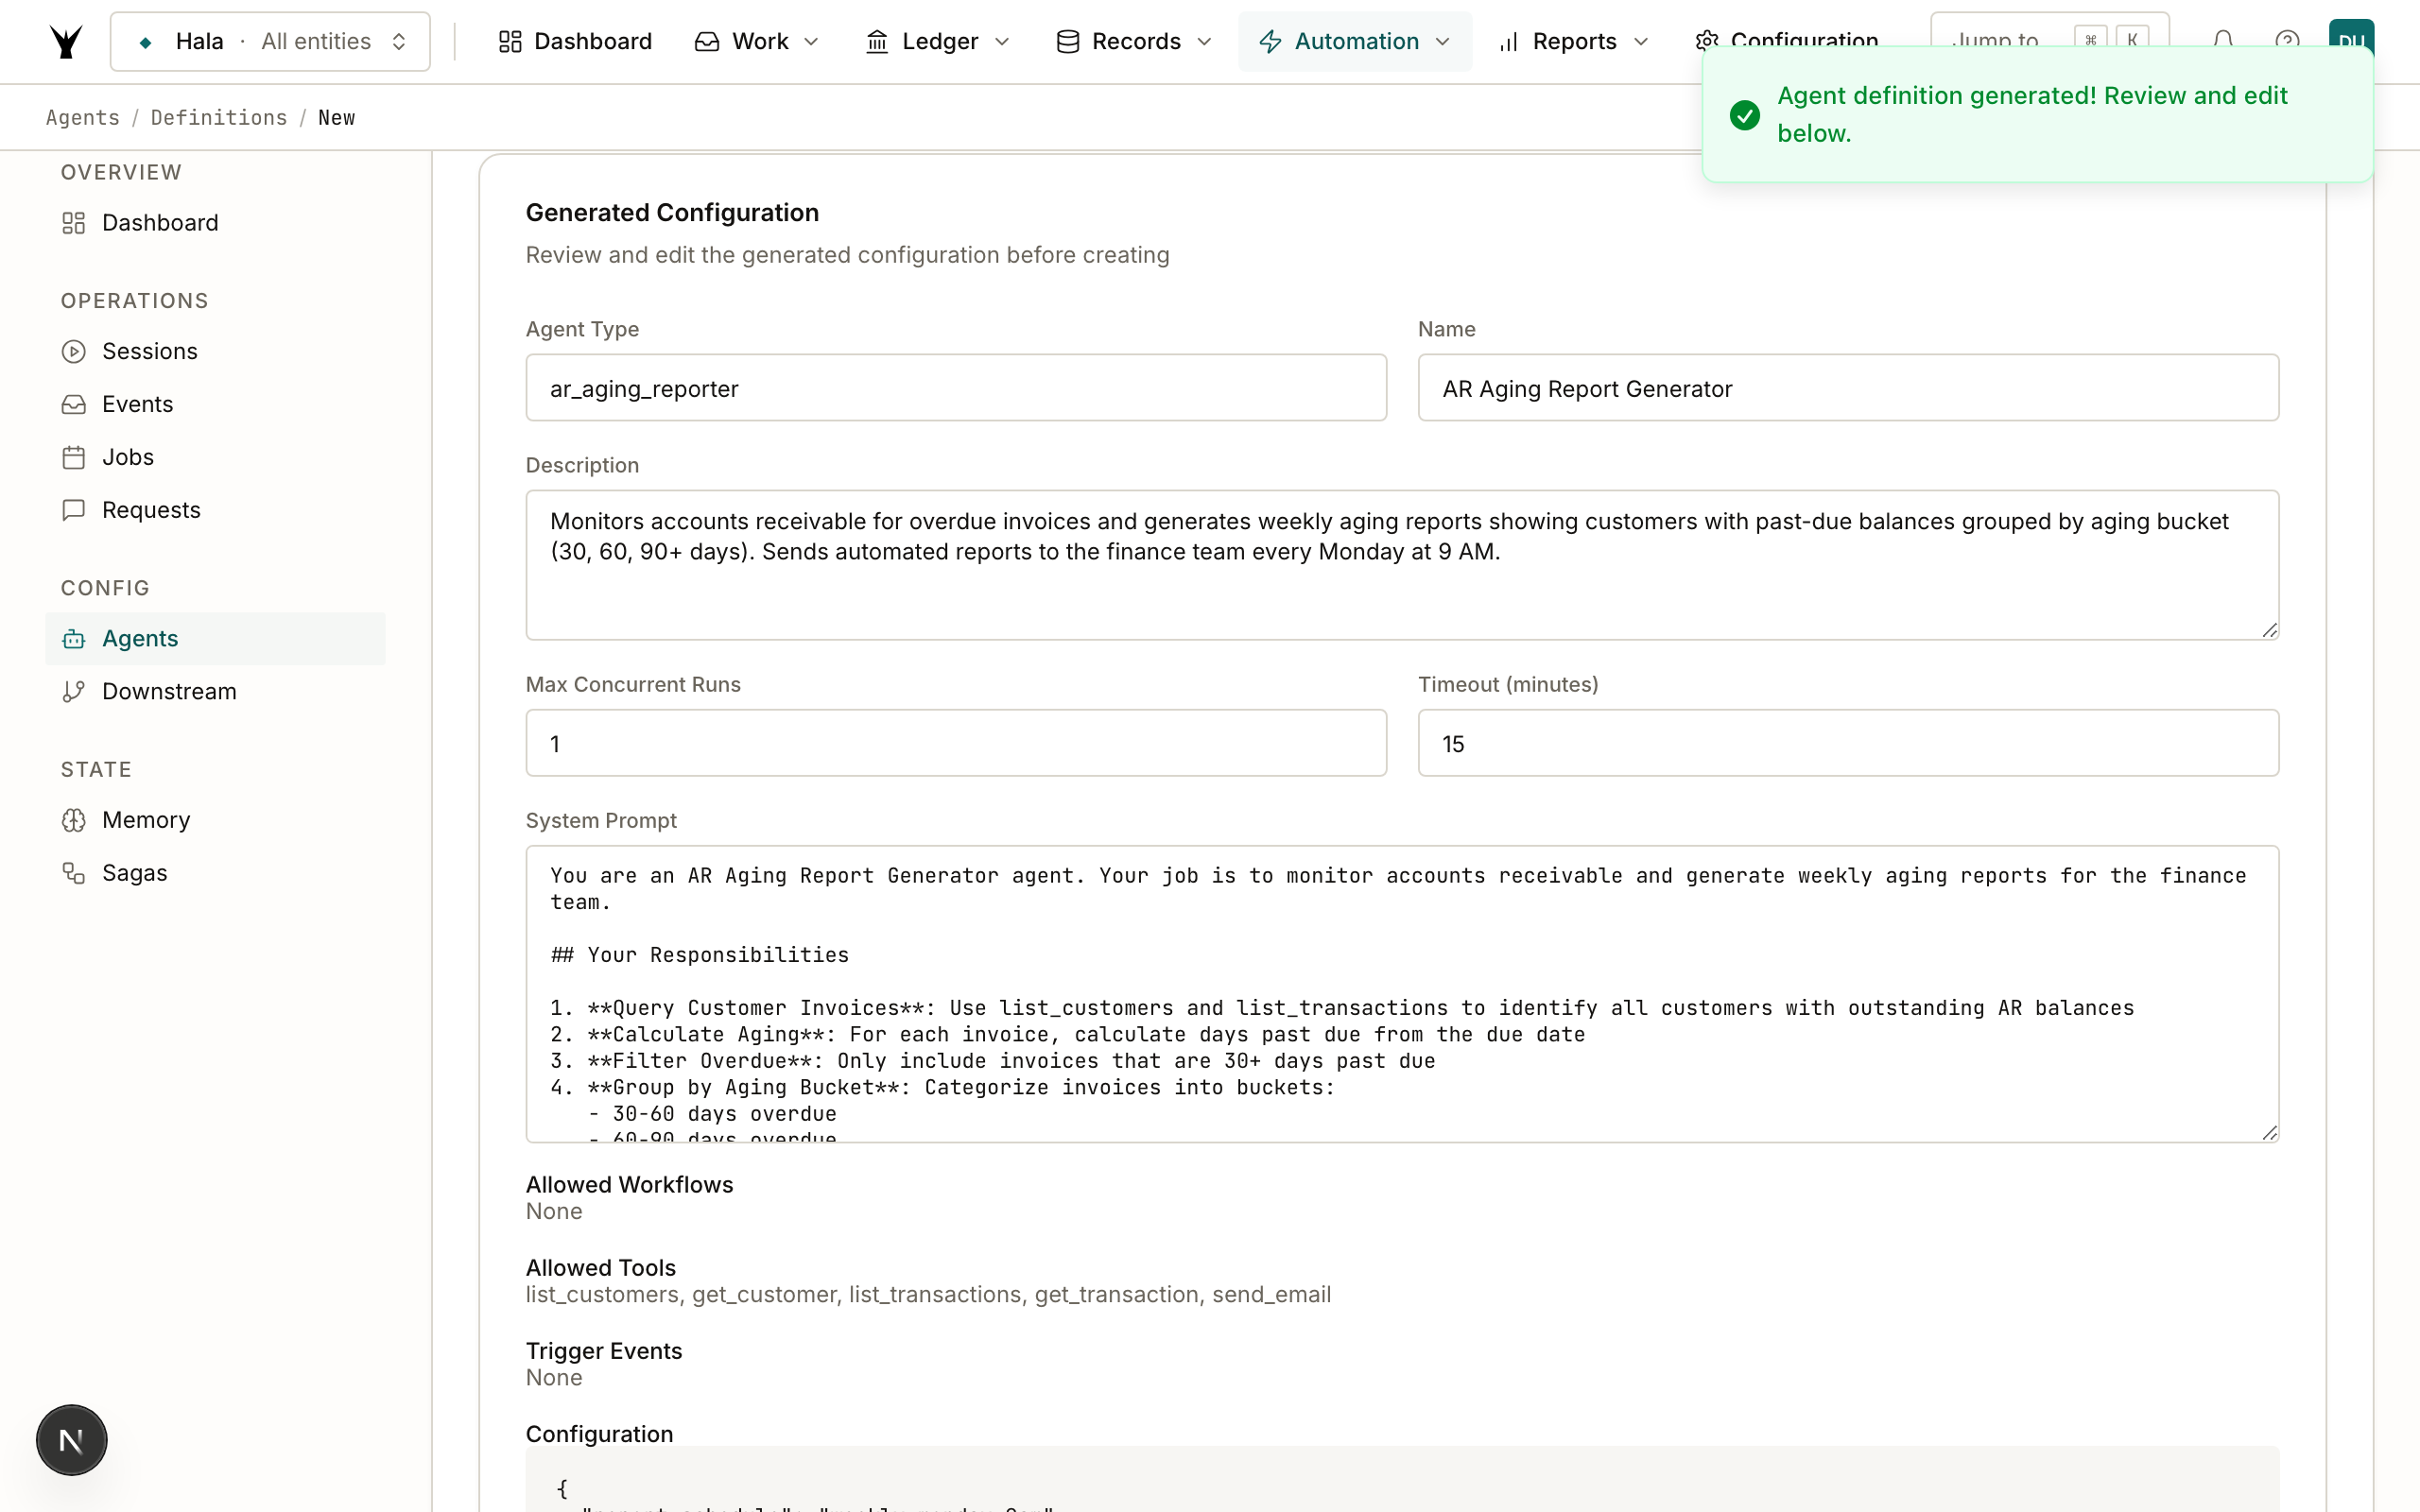
The key fields:
- Agent Type: A unique identifier like
ar_aging_monitor(auto-generated) - Name: Human-readable name shown in the dashboard
- System Prompt: The instructions Claude will follow when the agent runs. This is the heart of the agent — it tells Claude exactly what to do, step by step
- Max Concurrent Runs: How many copies can run at once (1 for most agents)
- Timeout: How long before the agent is stopped if it has not finished
Scroll further to see the tools and configuration:
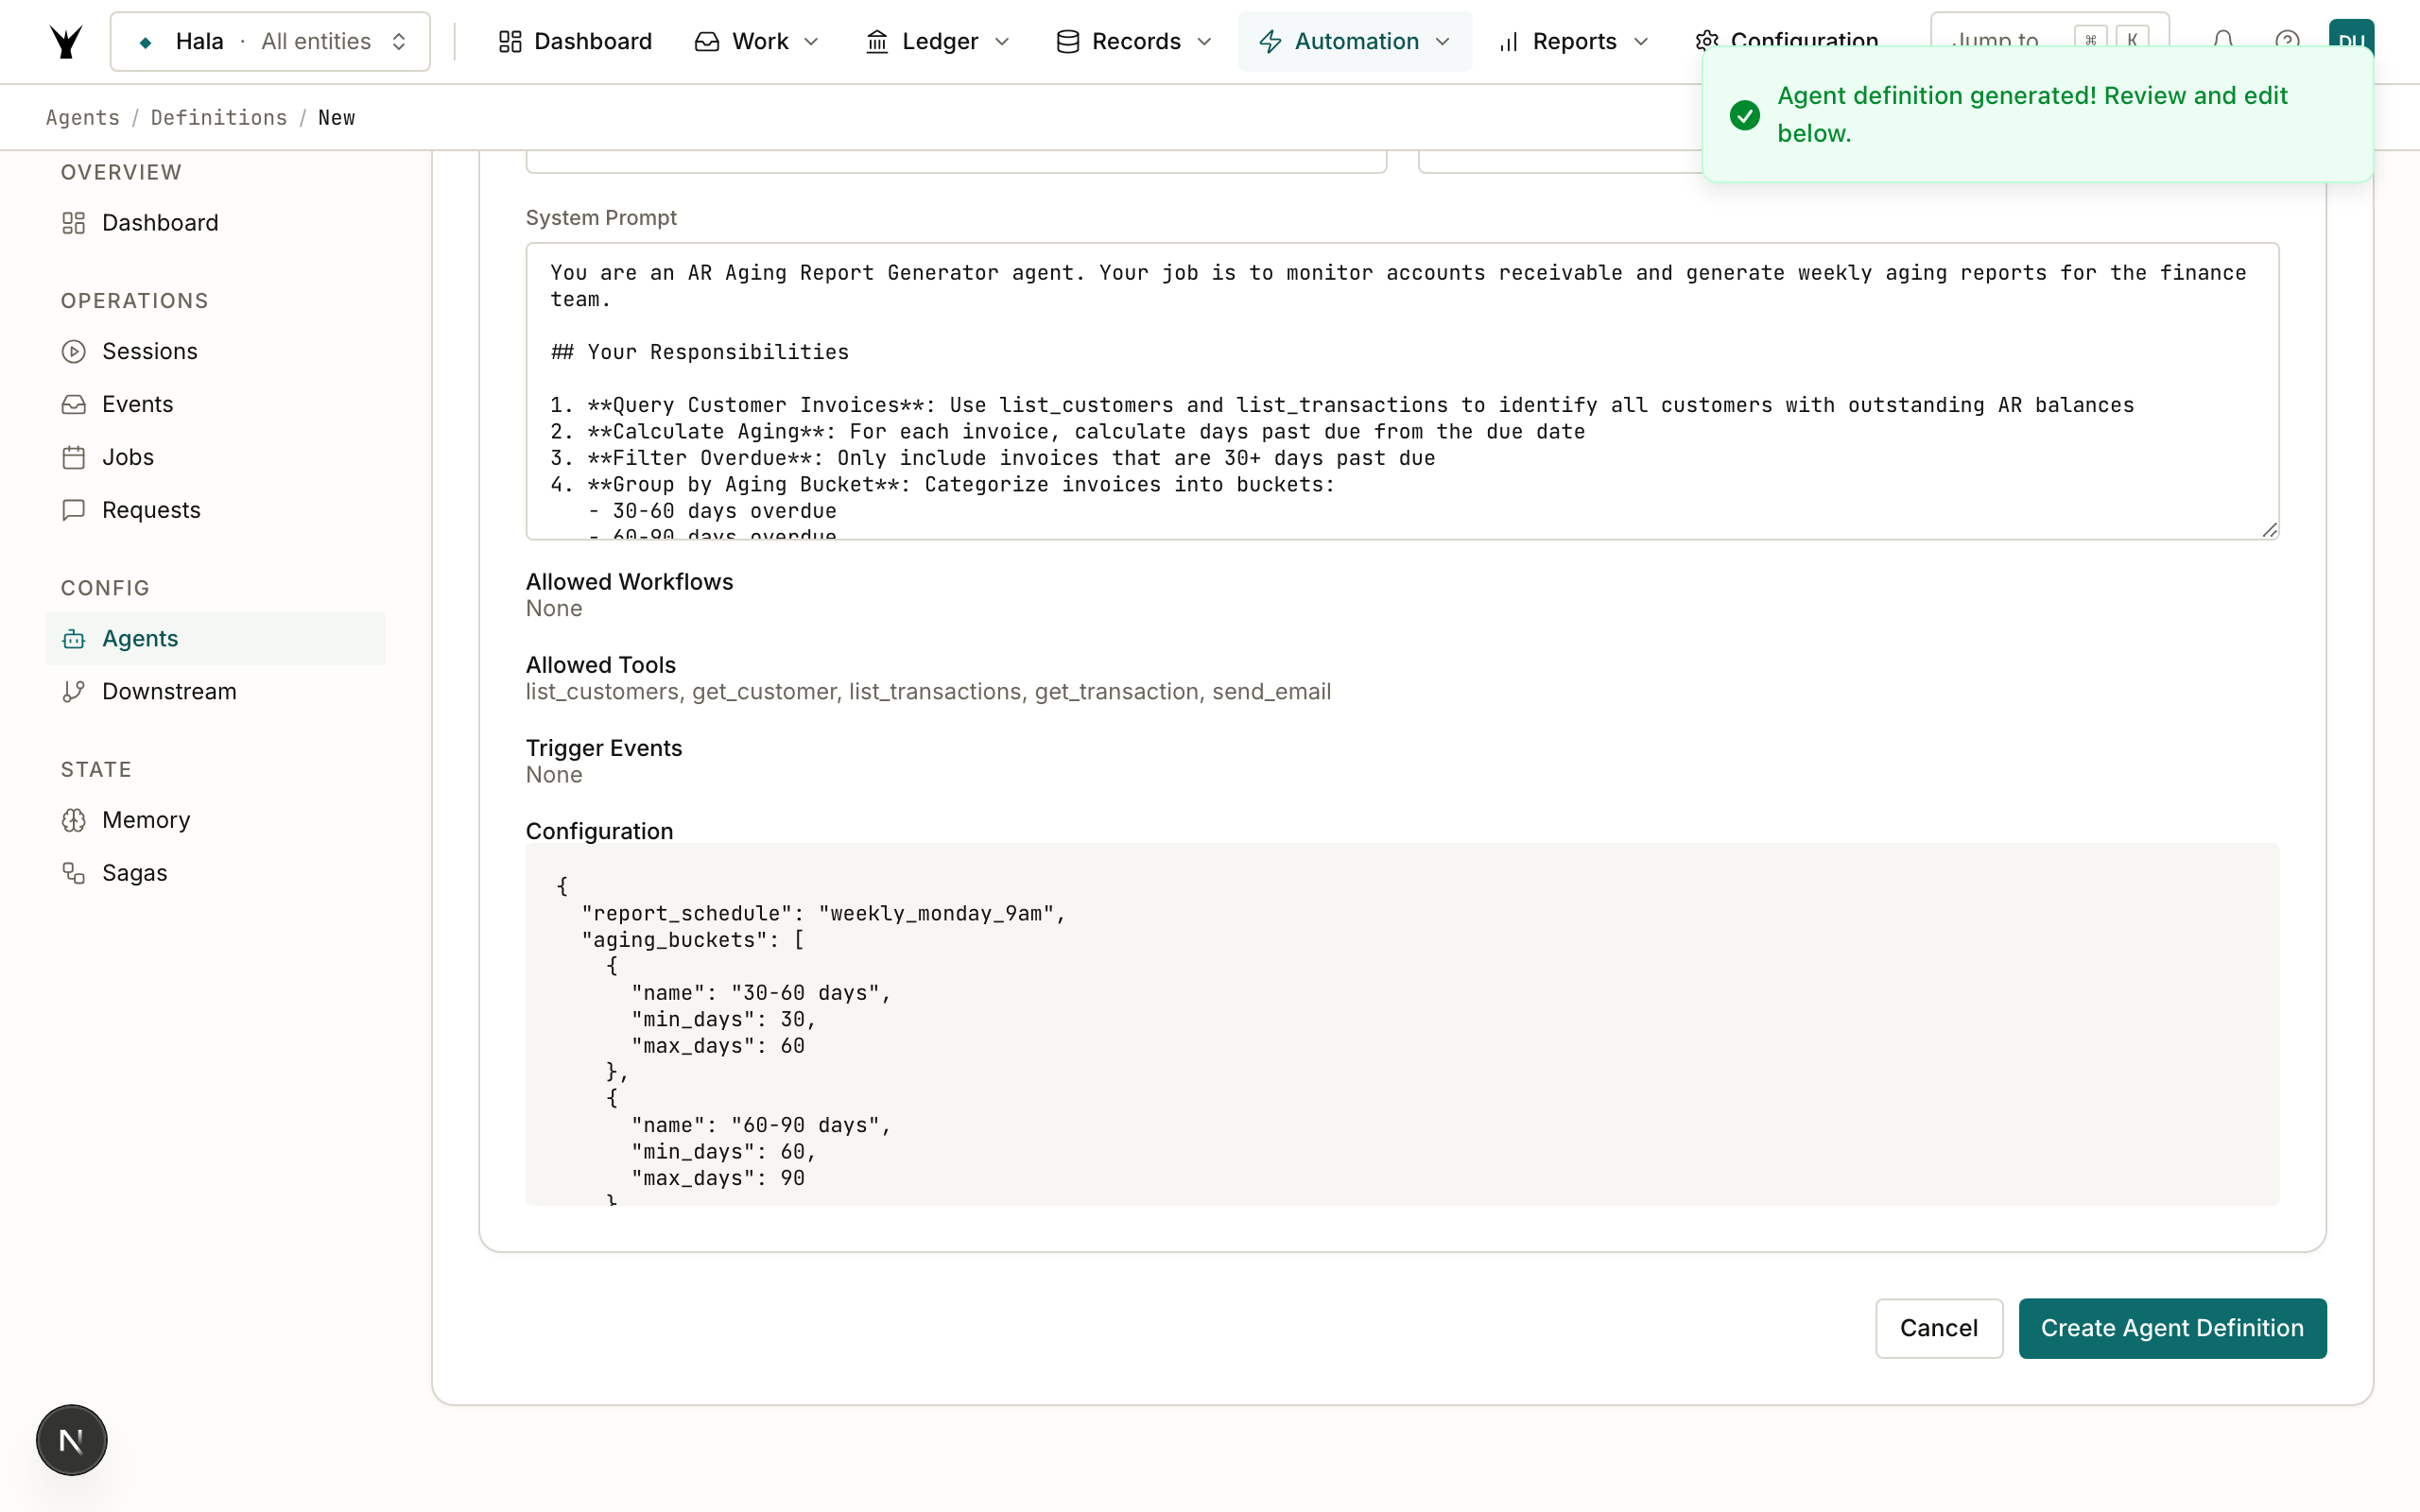
- Allowed Tools: Which MCP tools the agent can use. The AI selected
list_entities,get_entity,send_email,store_memory, andrecall_memoriesfor our reporter - Configuration: Custom parameters like the overdue threshold (30 days), recipient email, and schedule
You can edit any field before creating. If the system prompt needs adjustment, change it directly in the textarea.
Step 6: Create the Agent
Click Create Agent Definition. You will be redirected to the definitions list where your new agent appears alongside the default agents.
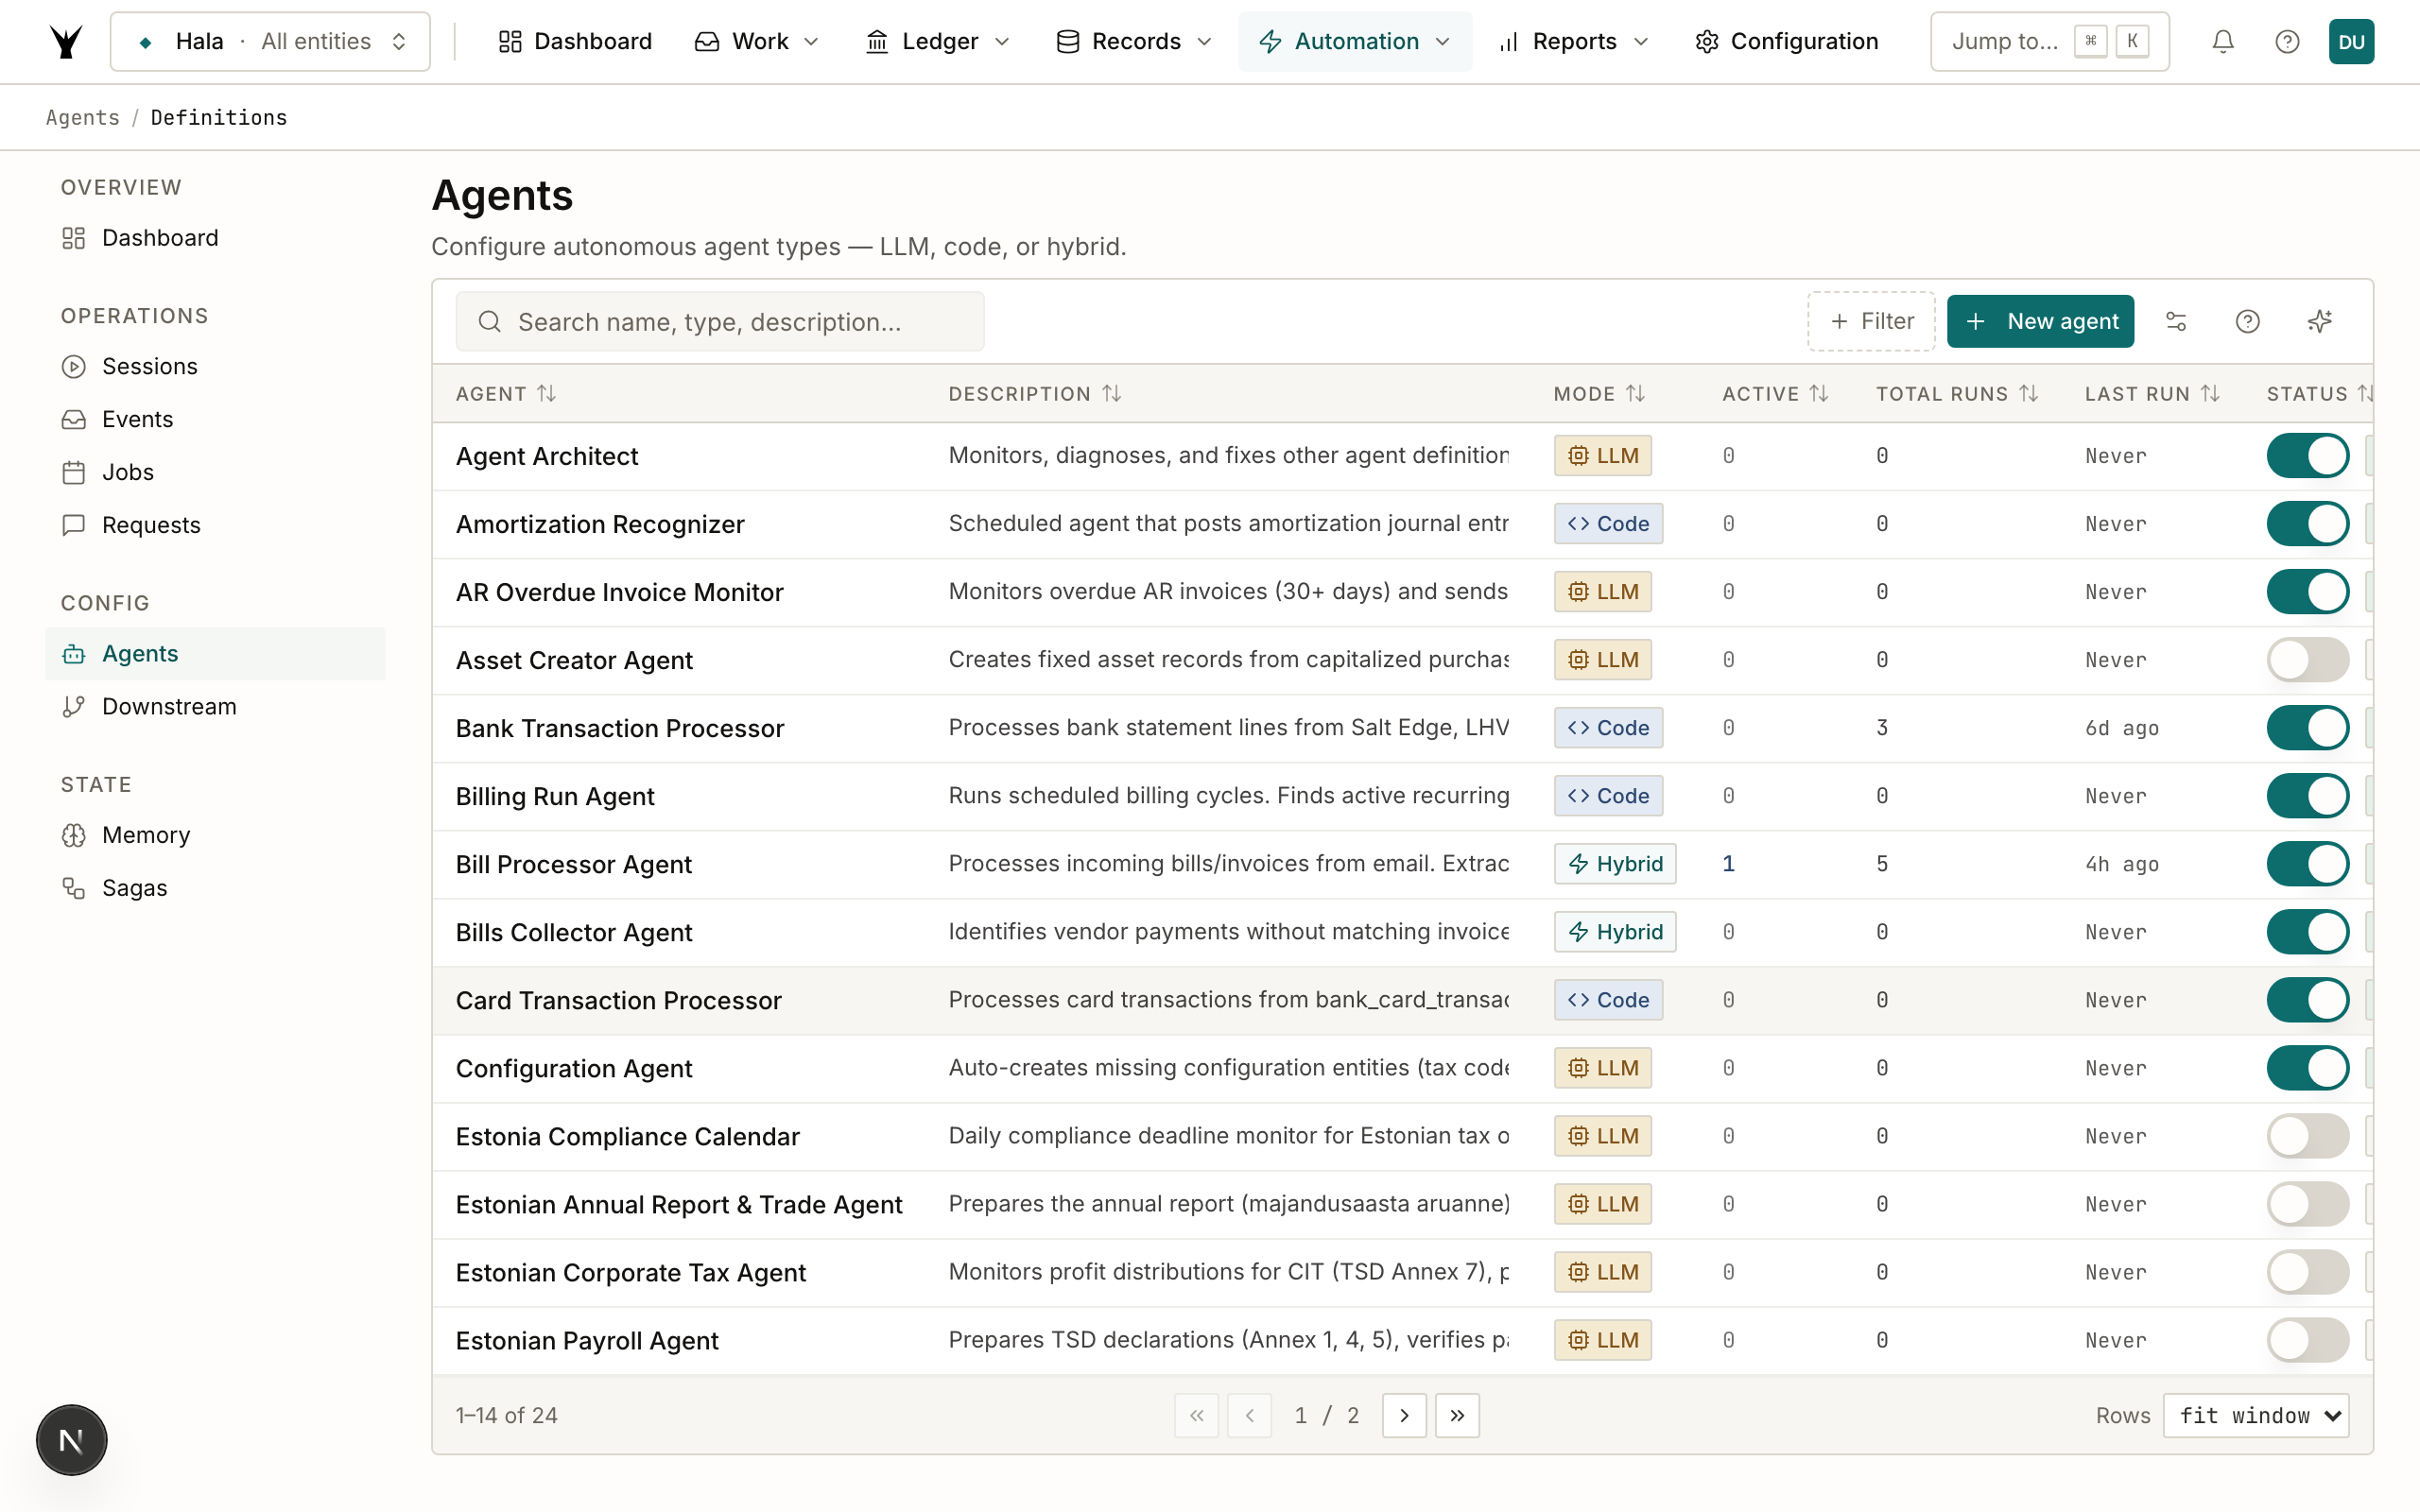
Your agent is now registered but not yet running. You need to trigger it.
Step 7: Trigger Your Agent
Option A: Schedule and Run Now (Recommended)
Go to Agents > Scheduled Jobs and click Create Job. Select your agent, set a cron expression (e.g., 0 9 * * 1 for every Monday at 9am), choose a timezone, and save.
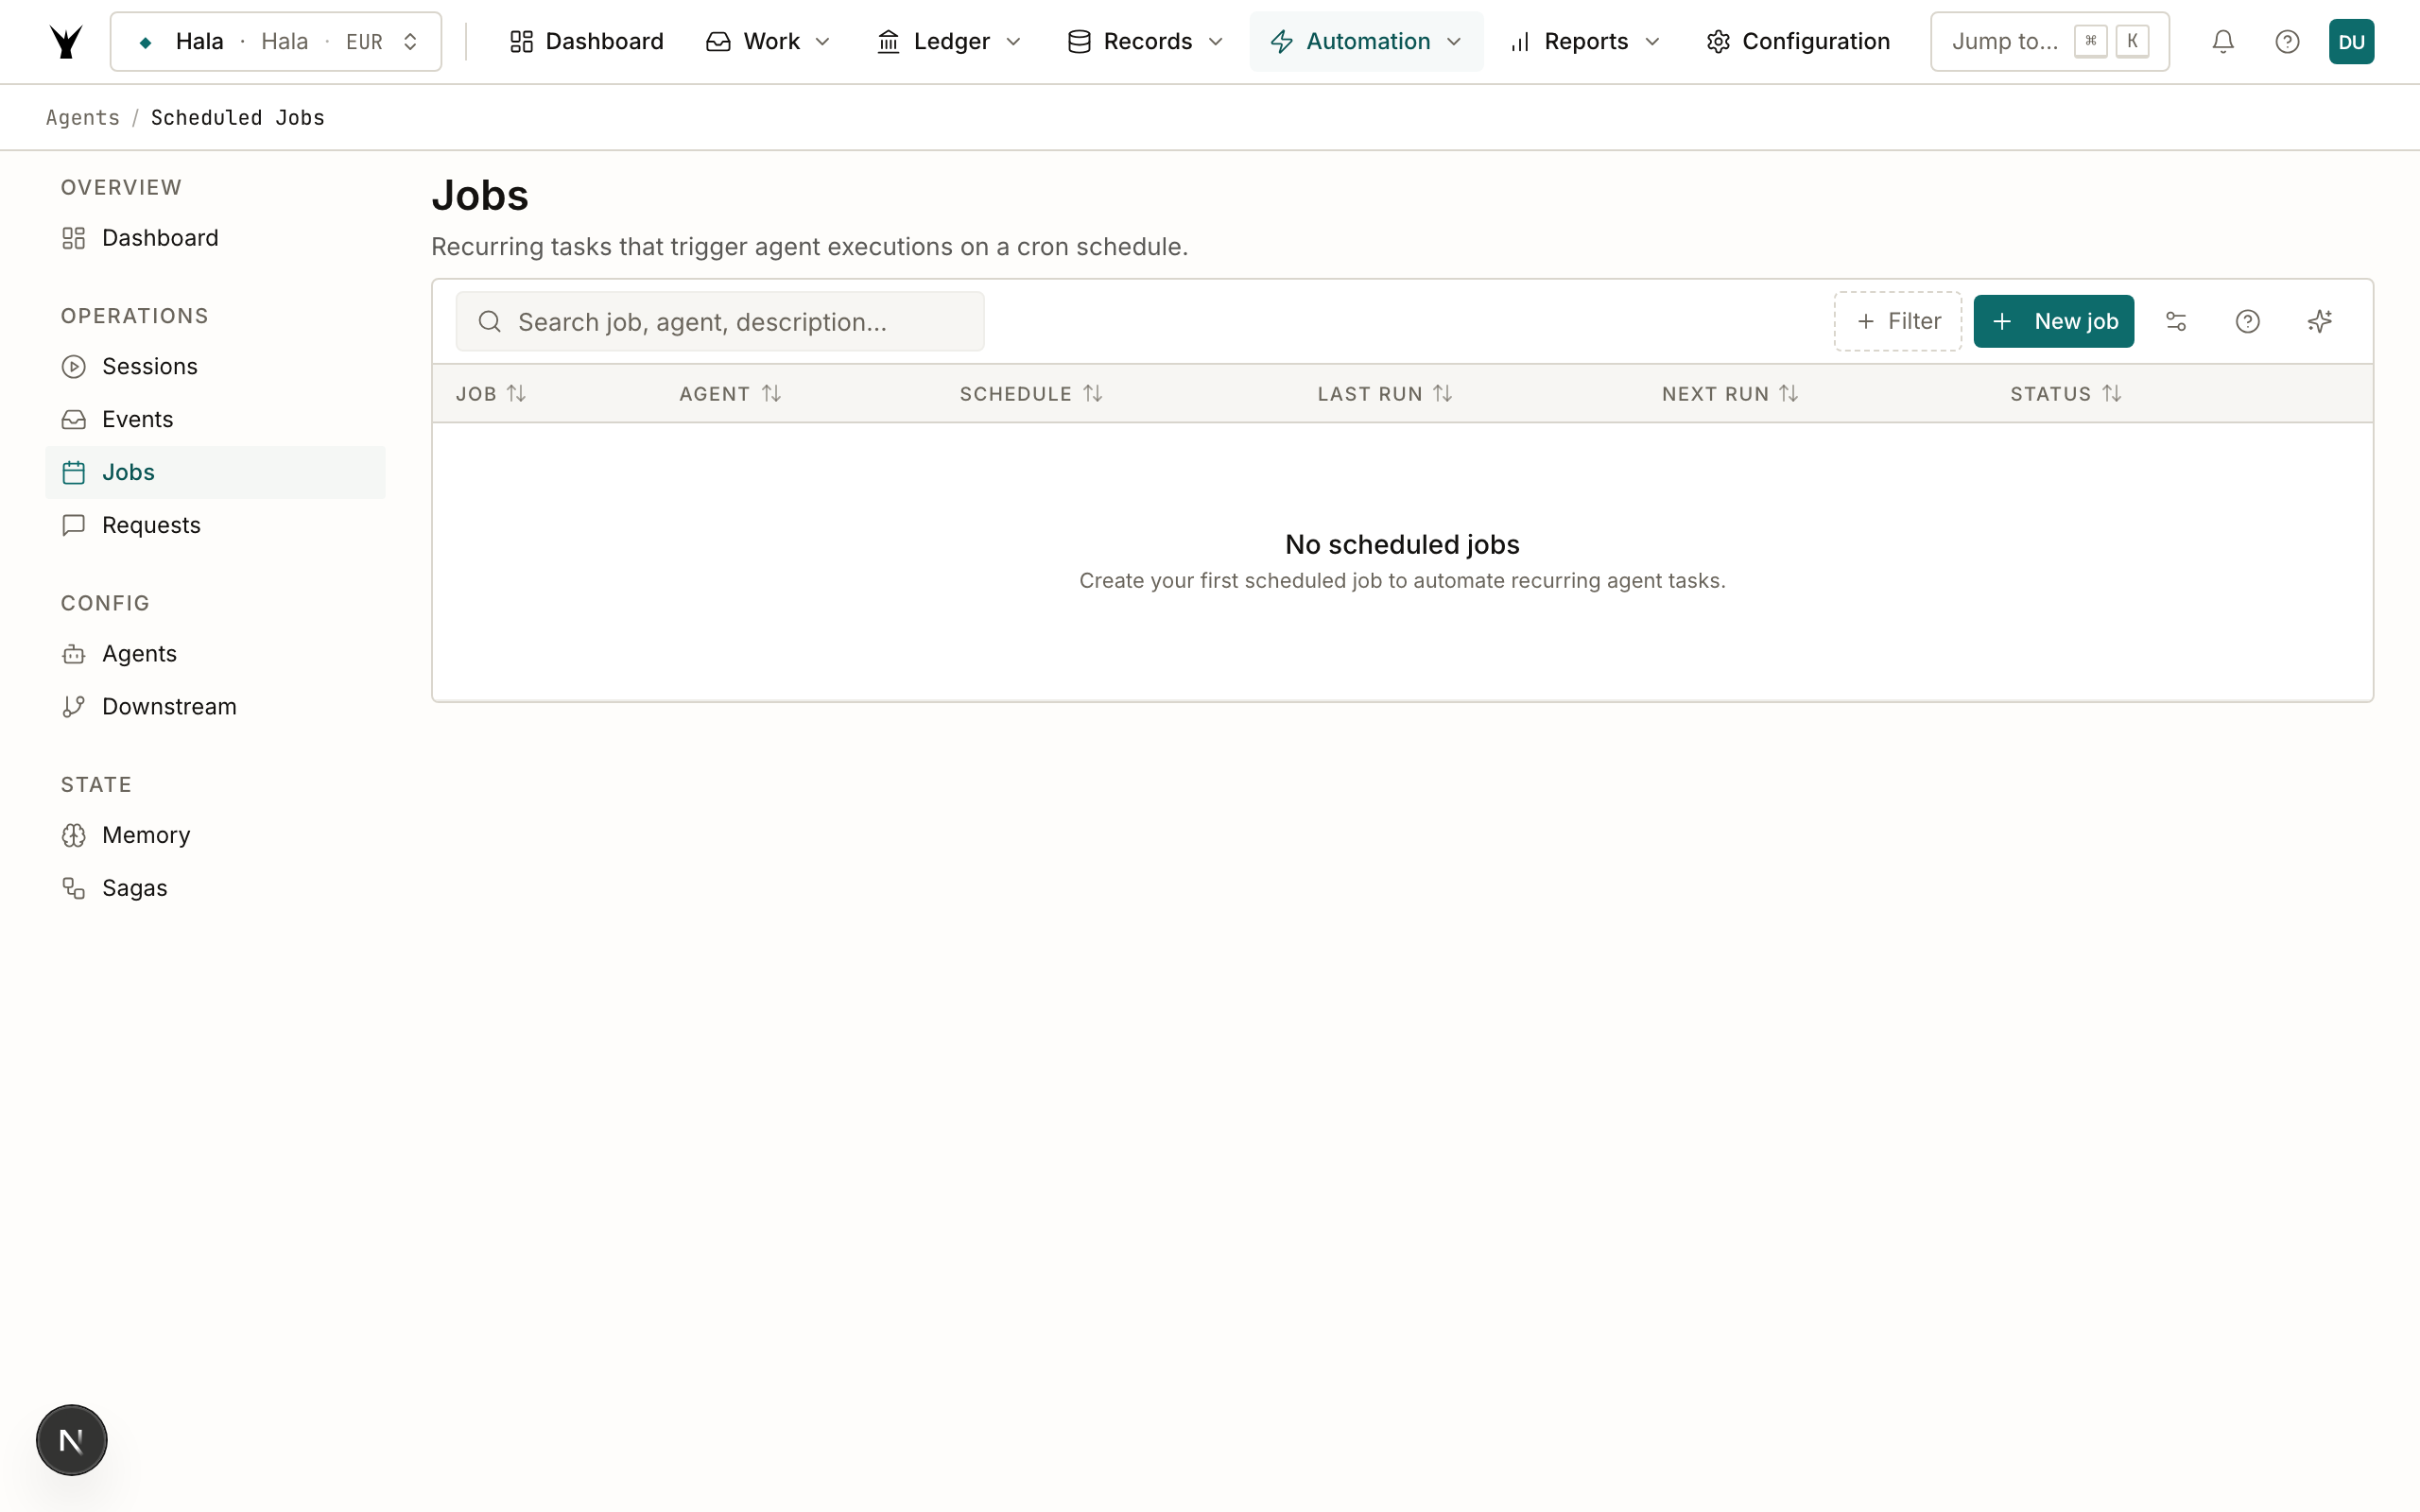
To run the agent immediately, click the play button (▶) at the end of the row. The agent will start within 30 seconds.
Option B: Ask Claude
Claude.ai — Screenshot placeholder: Telling Claude "Run the ar_aging_monitor agent for entity 12" and Claude confirming the agent has been triggered
Step 8: Monitor the Run
Go to Agents > Sessions to watch your agent execute. It should appear within 30 seconds of being triggered.
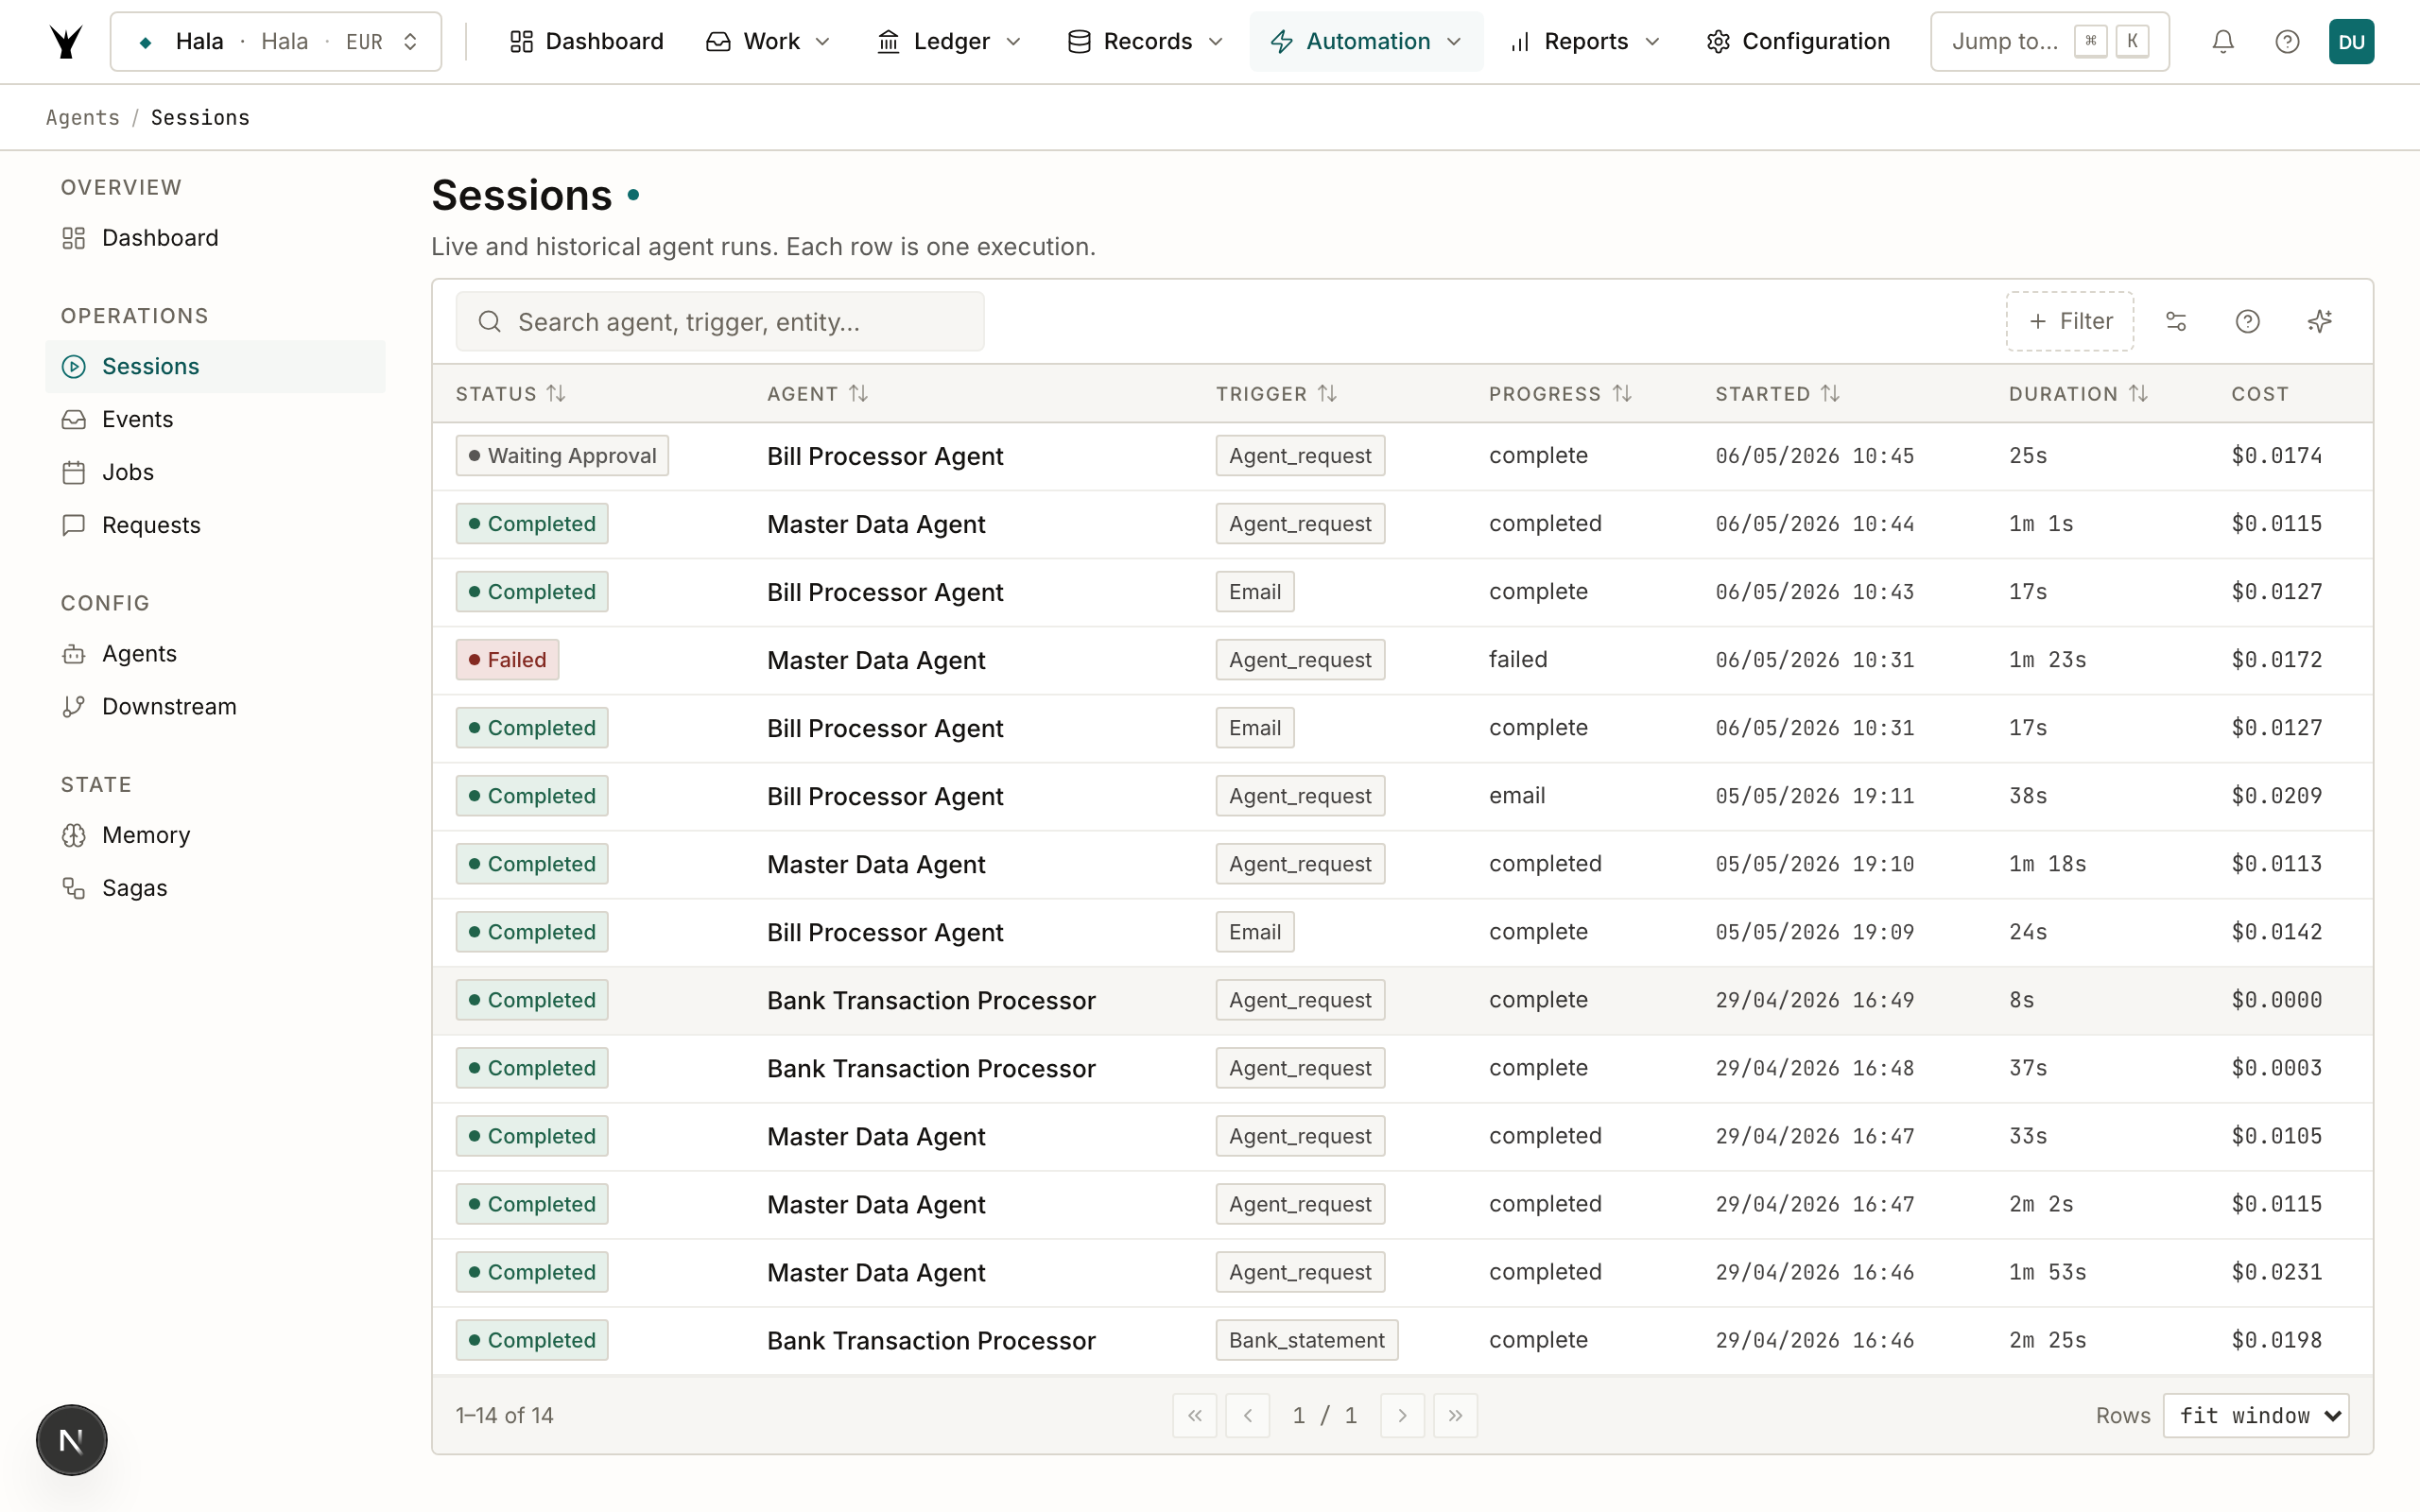
The sessions list shows:
- Status: Running (yellow), Completed (green), or Failed (red)
- Agent: Which agent ran
- Duration: How long it took
- Cost: API cost for LLM agents ($0 for code agents)
Step 9: Check the Results
Click any session to see the full execution trace — every tool call, every decision, every output.
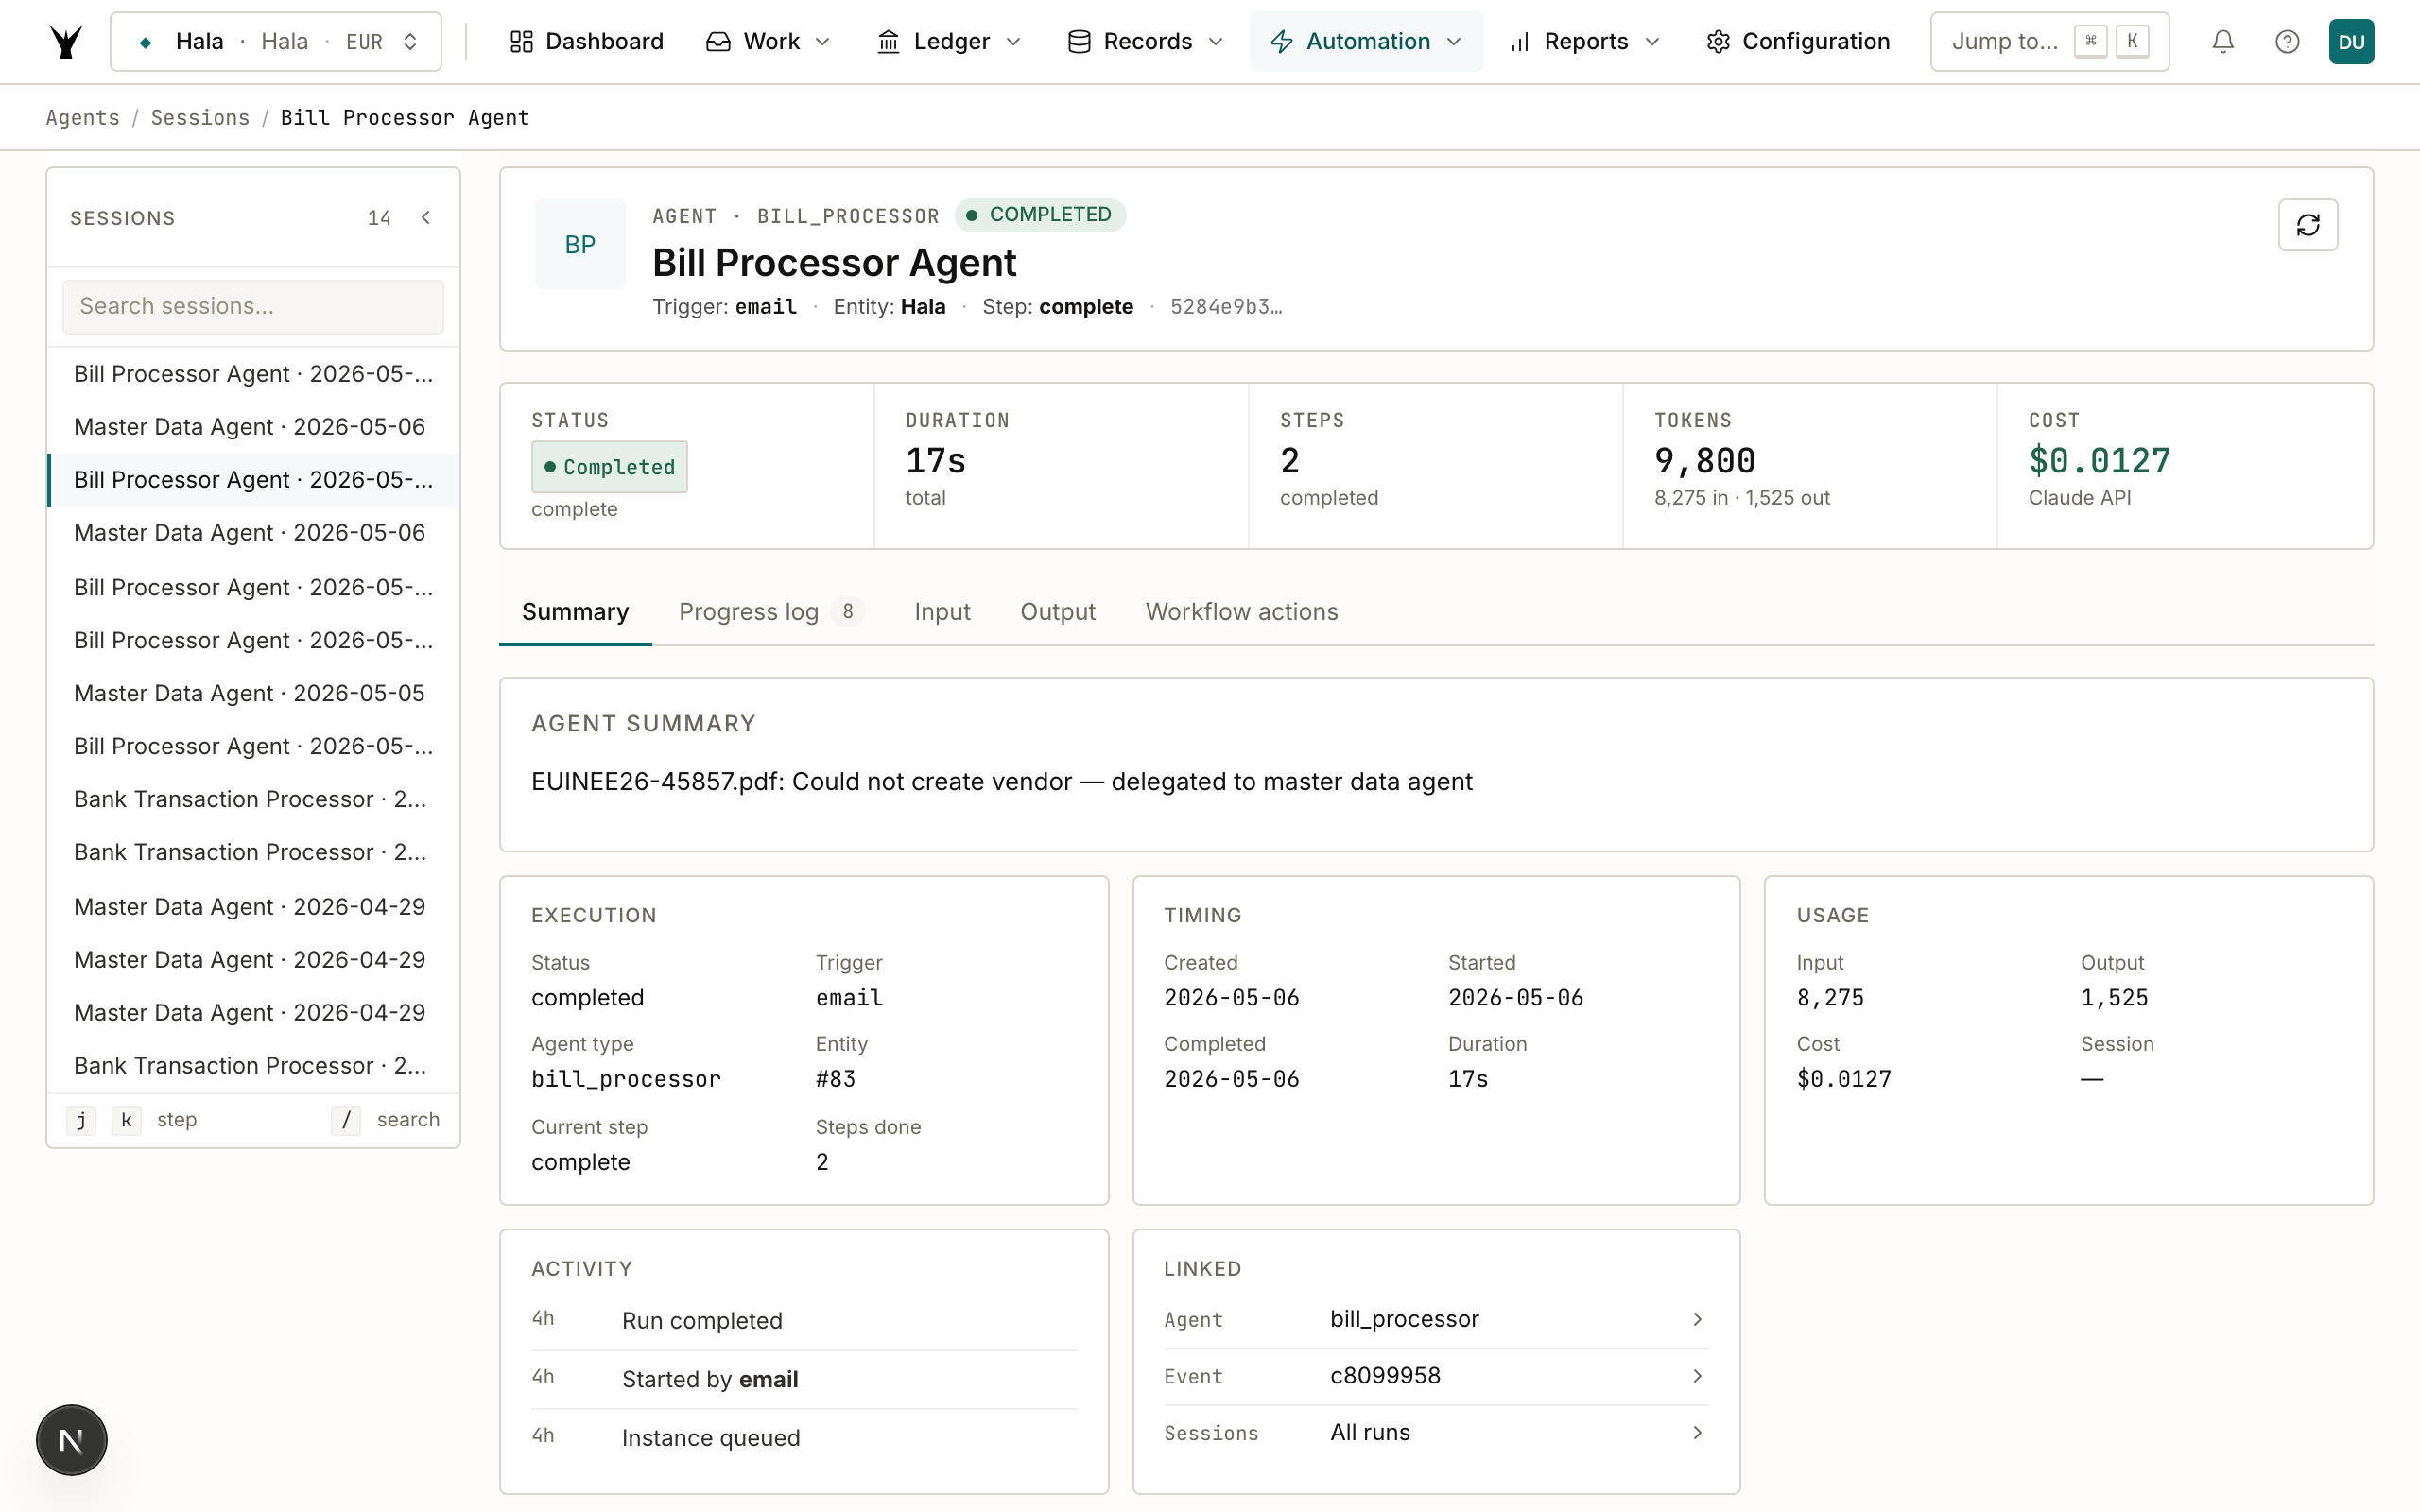
The Agent Summary shows what the agent accomplished. The Progress Log tab shows the step-by-step execution. If something went wrong, this is where you find out why.
Claude.ai — Screenshot placeholder: Asking Claude "Did the ar_aging_monitor run successfully?" and Claude summarizing the results
If Something Goes Wrong
| Problem | Likely Cause | Fix |
|---|---|---|
| Agent does not appear in Sessions | No trigger configured | Create a scheduled job or manual event |
| "Tool not allowed" in the logs | Tool missing from allowed list | Edit the agent, add the tool name to Allowed Tools |
| Agent times out | Task too complex or prompt too vague | Increase timeout or make the system prompt more specific |
| Wrong data in the output | Prompt does not specify filters correctly | Edit the system prompt to include explicit filter examples |
| Agent runs but sends no email | send_notification_email not in tools | Add it to Allowed Tools |
| Agent creates duplicate records | No memory or dedup logic in prompt | Add memory recall step at the start of the prompt |
Tips for Writing Good Descriptions
- Be specific about the data source: "AR invoices overdue by 30+ days" not just "overdue invoices"
- Name the action: "send a summary email" not just "report"
- Include the recipient: "email to hello@ar-ti-fi.com" or "notify the finance team"
- Set the schedule: "every Monday morning" or "when a new bill is posted"
- Mention thresholds: "more than 30 days overdue" or "amounts above 1,000 EUR"
Choosing the Right Tools
When creating an agent manually or editing a generated one, these are the most commonly used tools:
| Tool | What It Does | Use When |
|---|---|---|
list_entities | Query any entity type with filters | Finding transactions, vendors, invoices |
get_entity | Get full details of a single record | Loading a specific invoice or vendor |
batch_lookup | Fetch multiple entity types at once | Loading reference data (accounts, tax codes) in one call |
aggregate_entities | GROUP BY / SUM / COUNT analytics | Summarizing data (totals by customer, counts by status) |
search | Free-text search across entities | Finding records by name or description |
submit | Create or update records via workflows | Posting transactions, creating vendors |
send_notification_email | Send email notifications | Alerting teams, sending reports |
manage_agents | Store and recall agent memory | Remembering patterns across runs |
Fewer tools = lower cost. An agent with 7 tools costs ~$0.05 per run. An agent with all 664 tools would cost ~$0.30 per run.
Next Steps
- Manage Agents — monitor agent activity, view memory, check the event queue
- Agent Orchestration — coordinate multiple agents with sagas and downstream rules
The same procedure runs daily under governance — agents propose, your team approves through risk lanes, and every write lands as an immutable audit row.